If you are writing unit tests in .NET, you may eventually find the need to generate code coverage reports to show how much coverage your project has. The best tool for code coverage reports in my experience has been coverlet because it supports both .NET Framework and .NET Core.
NUnit
NUnit, the tried and tested framework originally being a port of JUnit. A powerful tool that when combined with coverlet console can be used to generate code coverage reports. To demonstrate, I will create an NUnit test project targeting .NET Framework 4.8 along with a Class Library type project also targeting .NET Framework 4.8
The class library is going to be simple, it will have a single class called Calculator, this class will have a method that adds two numbers together. A classic example used often in programming tutorials.
The calculator class definition can be seen in the code snippet below.
| |
And the following code is one of the tests that I created. It asserts that adding 1 and 2 results in 3.
| |
To generate a code coverage report for the unit test above I will need to install the NUnit console so that I can execute the test from a terminal like Powershell. You can install the NUnit Console by going to the official repository, under releases, find the latest version, and install it. If you are a fan of Chocolately then you can install the console runner by running the following command from a terminal.
| |
Confirm the console was installed correctly by running the following command on a terminal.
| |
If the command is not recognized, then you will need to update your path environment variables to include nunit-console.exe.
The environment paths are as follows
| |
If you install the nunit3 console throught chocolatey on the C drive.
| |
Is the path if you install the nunit console through an exe obtained under the releases tab in the official repo.
The next step will be to install a .NET Core SDK. As of November 2022, the SDK is at version 7, since .NET 7 was just released.
With the .NET SDK installed, run the following commands.
| |
The first tool, the report generator is a tool that will create an HTML report from the output file created by the coverlet console.
With everything installed, I can create the report using the following command.
| |
The command above can be broken down as follows.
- coverlet is used to invoke the coverlet console with a path to the DLL that contains the unit tests.
- target is used to invoke an external test runner, in this case, NUnit 3.
- targetargs is used to pass parameters to the target runner, NUnit. In the case above we are telling Nunit to run the tests located in the TestProject2 by giving it a direct path to the DLL, then we use –noresultto tell NUnit to not generate a test result file. I am using this argument here because, for our example, we are not interested in the test results file genearted by NUnit. If you are interested in the file, then ommit –noresult from the command.
- format is used to tell the coverlet console what format should be used when it outputs the coverage report. In this example I used opencover, the available formats are json, lcov, opencover, cobertura, and teamcity.
- output is used to let coverlet know where to place the final result as well as what to name the file.
All the supported parameters for the coverlet console are documented here. The parameters that can be passed to NUnit under –targetargs are documented here.
The content of the results.xml file is as follows.
| |
This is the code coverage report, we can prettify it into an HTML document by using reportgenerator as follows.
| |
The command above can be broken down as follows.
- reportgenerator is the dotnet tool we installed, it will take the XML file, inspect the contect of said file, then create an HTML report from that content.
- reports is the path to the location of the report you which to convert. Note that it accepted wild cards. You can use **/*.xml for recursive search.
- targetdir is used to specify the location where the report should be generated. If the folder does not exist, it will be created.
- reporttypes is used to specify the report format, in this case, Html.
The resulting HTML report will be located under the report folder, in that folder, locate the index.html page and you should see the code report summary as showned below.
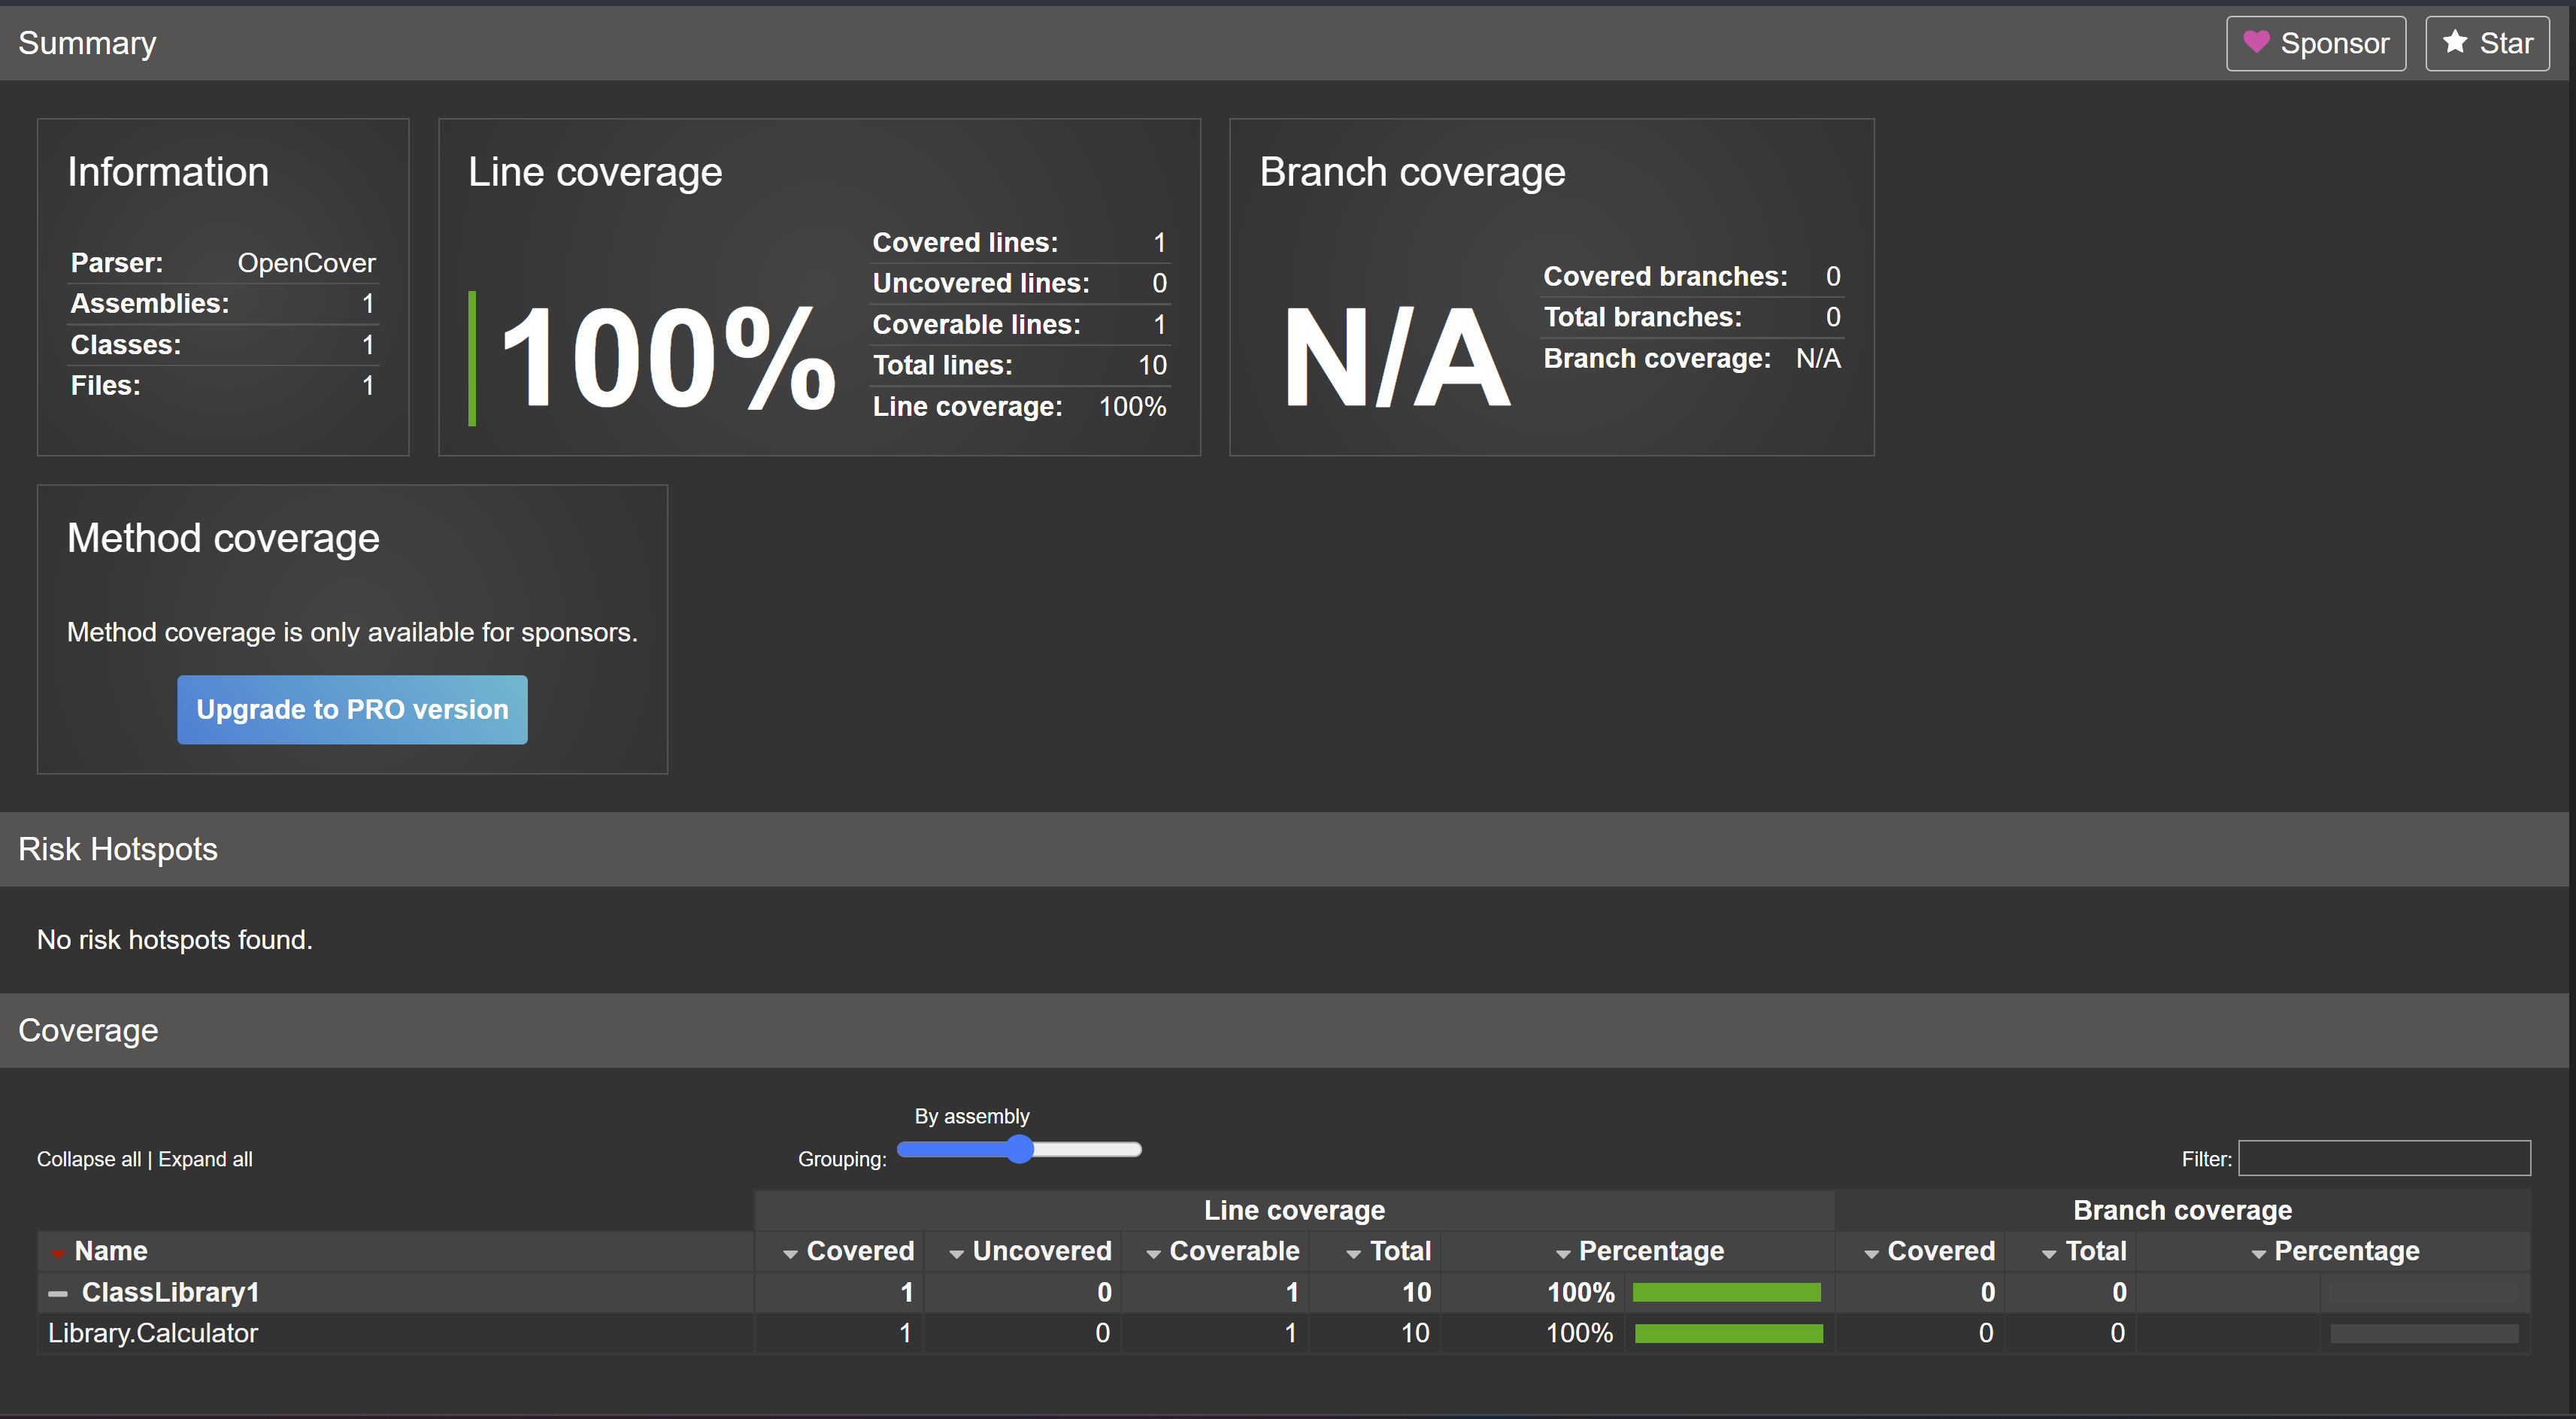
As you can see from the image, an HTML report was generated from the result.xml file, and as you can see from the image the Calculator class has full code coverage.
XUnit
If you are using XUnit and would like to generate code coverage reports as demonstrated above then you are in luck, because generating reports in XUnit is much easier than NUnit. To demonstrate how to generate code coverage reports with XUnit, I will clone the Calculator project mentioned above for NUnit but this time I will target .NET 6.
I will once again created the Calculator class.
| |
and added unit tests but this time using XUnit.
| |
To get code coverage, we are going to need to add a few additional NuGet packages. Those packages are as follows.
- xunit.testlogger - This is an XML logger for XUnit.
- coverlet.collector - Coverlet, the tool used for code coverage.
These packages must be installed on the test project by running the following commands.
| |
Replace Test.csproj with the path to you project.
To generate a code coverage report I will build the solution and then run the following command from a terminal.
| |
The command above can be broken down as follows.
- dotnet test is used to run the unit test project, in my case I use the solution file but you could give it the csproj file of the unit test project.
- configuration is used to set the .NET configuration, in my case I wanted to run the unit tests under the Release configuration
- collect set the data collection using a friendly name. The “XPlat Code Coverage” argument is a friendly name that corresponds to the data collectors from Coverlet. This name is required but is case-insensitive.
- logger is used to specify a logger for test results. For a list of available options see Available test loggers.
- DataCollectionRunSettings is used to set the format, in my case opencover.
Just like before, the command generates an XML file, in my case the file is located in the same folder as the XUnit project. The file is named coverage.opencover.xml and the content inside is as follows.
| |
And just like before, I can prettify the XML by converting it to an HTML document using the following command.
| |
The command above can be broken down as follows.
- reportgenerator is the dotnet tool we installed.
- reports is the path to the location of the report you which to convert. Note that it accepted wild cards. Note the usage of double wildcards for recursive search.
- targetdir is used to specify the location where the report should be generated. If the folder does not exist, it will be created.
- reporttypes is used to specify the report format, in this case, Html.
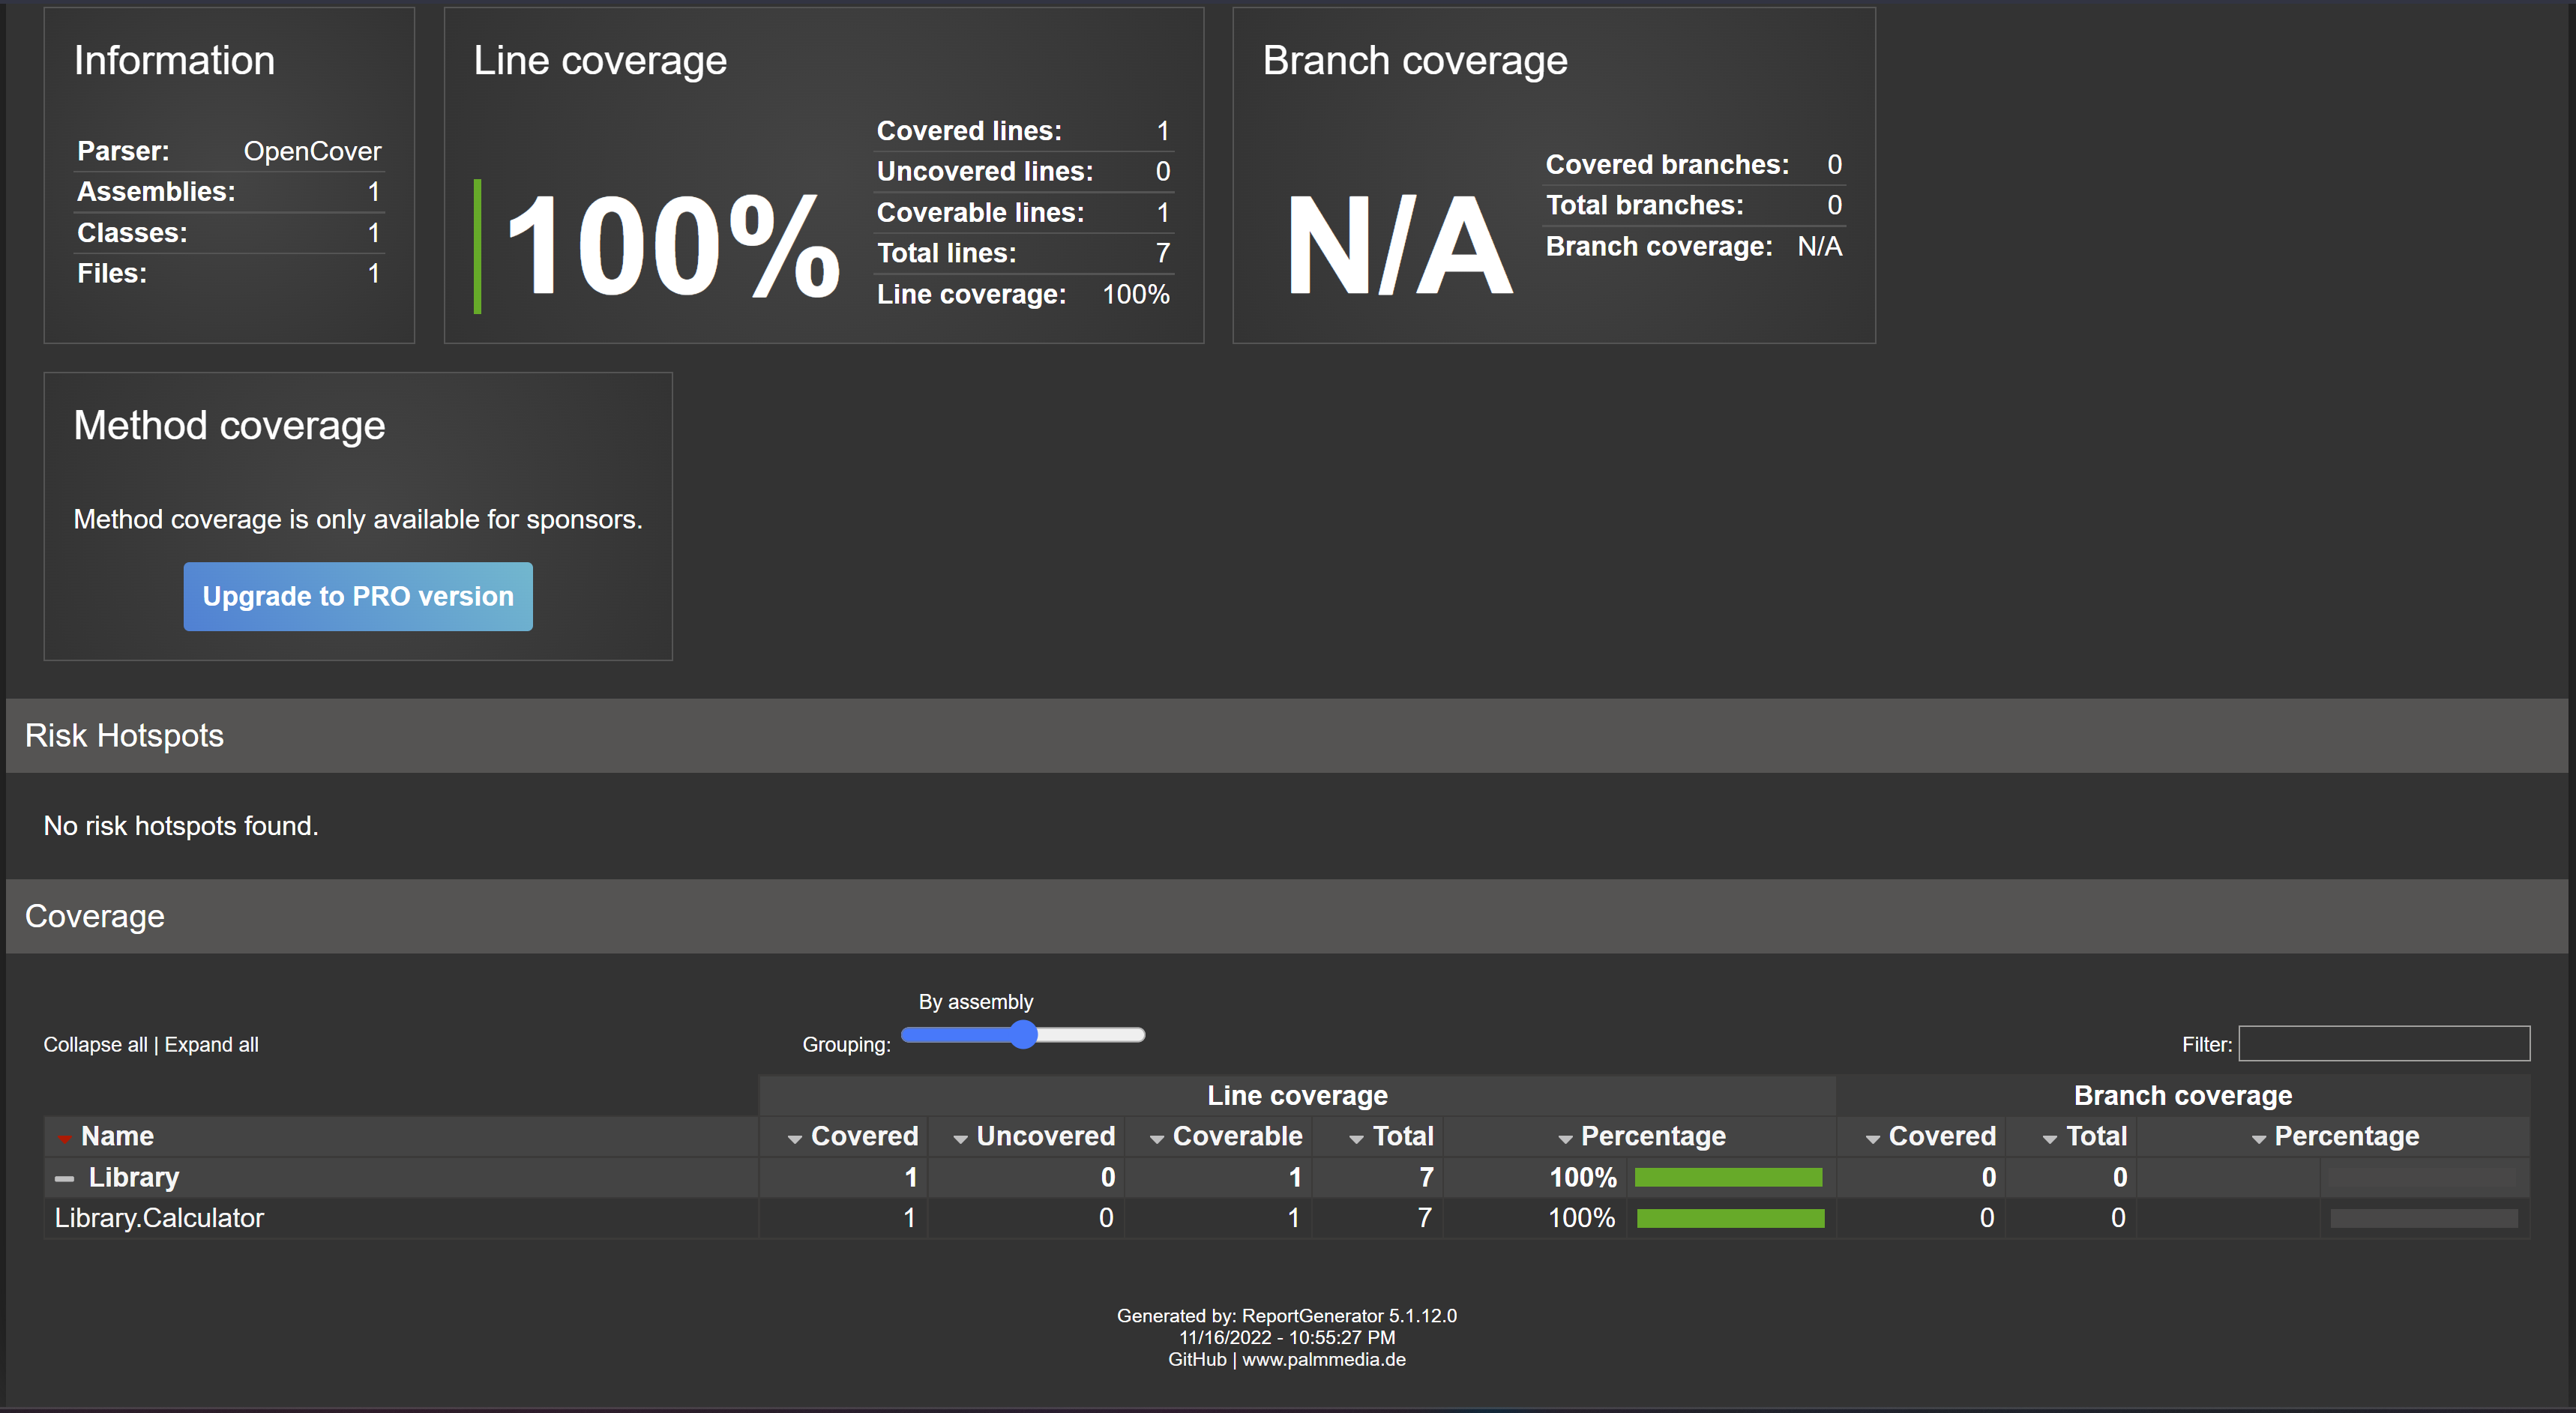
As you can see, I get an HTML report that is very similar to the one generated in the NUnit example, which is expected.
Conclusion
I hope these two examples can guide you in adding cove coverage reports to your projects. Feel free to reach out if you have any questions.