In my last post, Kubernetes In WSL - Connect to a service from Windows, I explored a few ways to connect to a Kubernetes service from the host machine, Windows. In the end of that blog post, I stated that using HostPort was the best option because at the time I did not know how to assign a static IP address to WSL.
Without using a static IP address, when WSL is restarted a new IP is assigned. Having a dynamic IP made it harder for me to connect to a Kubernetes service from Windows as I would need to update all my configurations whenever a new IP was assigned to WSL.
Luckily I was not the only developer that wanted WSL to use a static IP. In WSL2 Set static ip?, a few developers outlined how you can create a Hyper-V switch to bridge the network between WSL and Windows. By using a Hyper-V switch, the WSL IP becomes static, and by having a static IP, I can create a load balancer that uses that static IP to serve traffic.
In today’s post, I want to demonstrate how to create a Hyper-V switch, how to assign it to WSL distro and how to add a load balancer to a Kubernetes service that uses the static IP.
Prerequisite
Before I get started I wanted to point out some requirements. First, you need to be on Windows 11 Enterprise or Pro, Hyper-V is not available in Windows 11 Home, though you can try to enable it using the method documented in this post. As far as I know, what I am about to show you does not work on Windows 10 or older Windows systems.
Below you will find my current system spec, you should be using the same version or higher.
| |
and my WSL version, you should be using the same version or higher.
| |
Hyper-V Switch
The first step in using a Hyper-V switch is to enable the feature in Windows. Open Powershell as an admin and run the following command.
| |
After the command has been successfully executed you will be prompted to restart Windows, do so.
Once Windows fully boots up, search the Hyper-V manager on the start menu and open it.
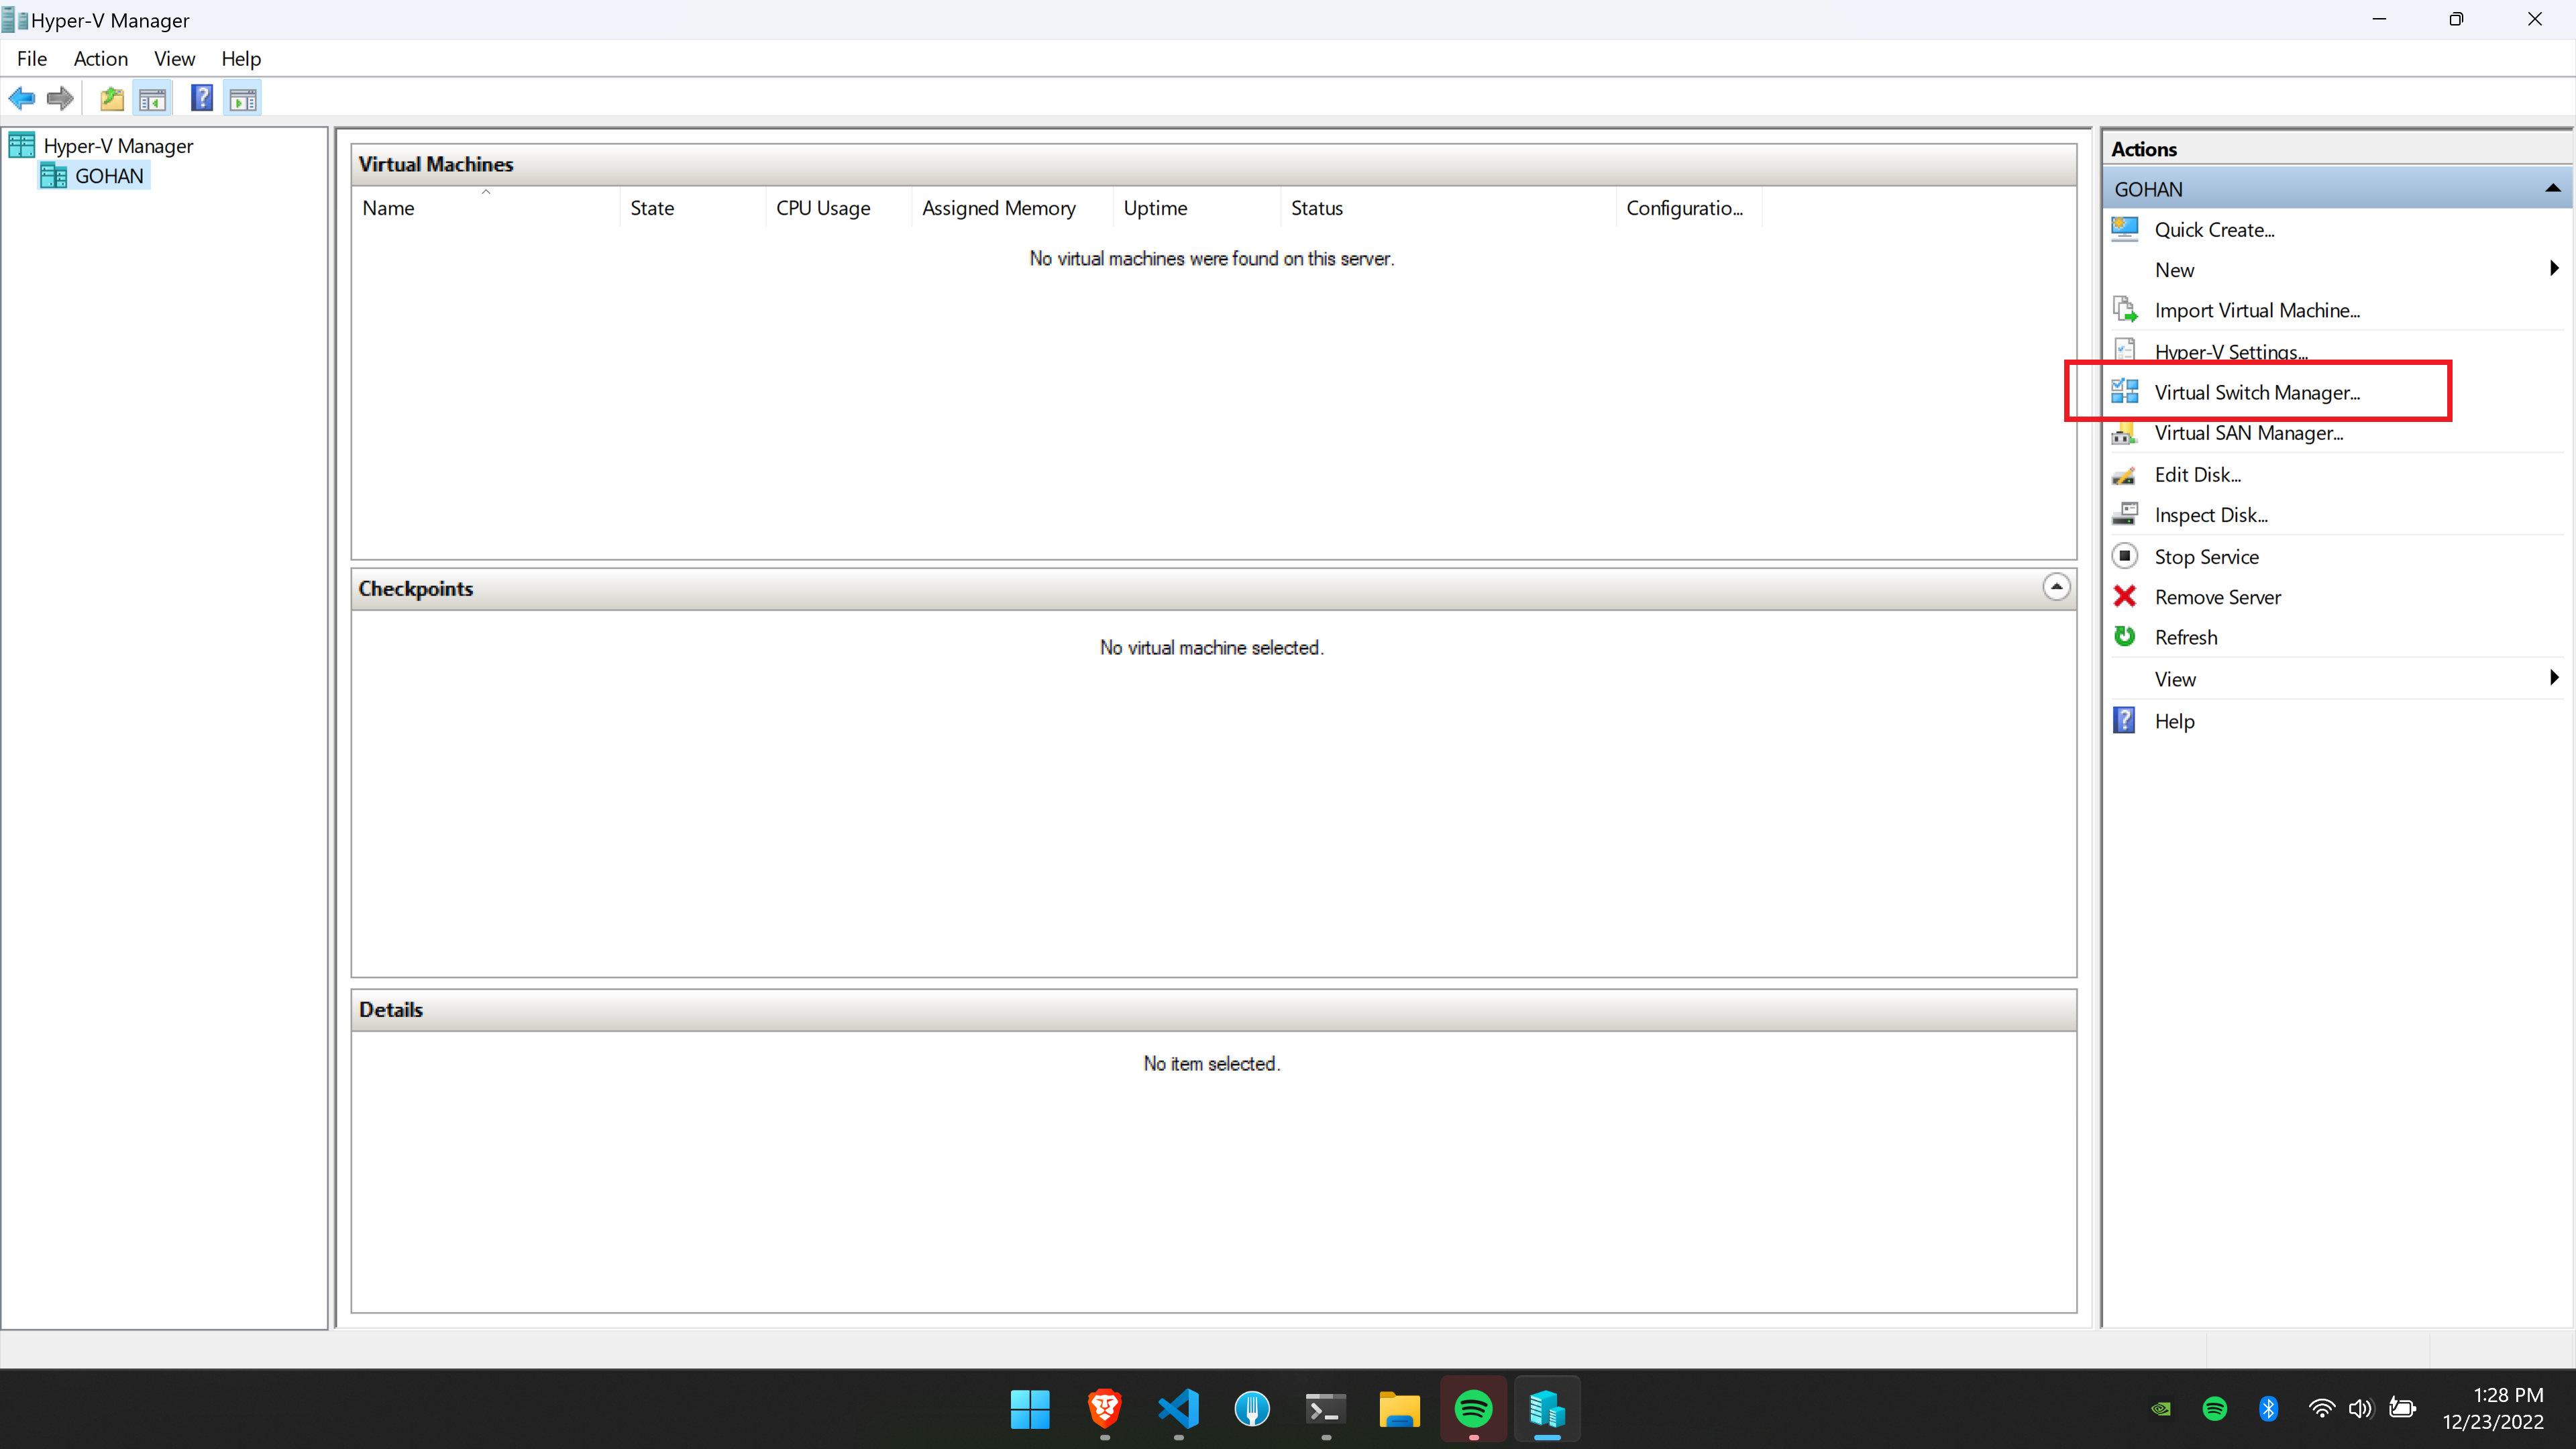
Inside the Hyper-V manager, under Actions, there should be an option called “Virtual Switch Manager”, click on that option
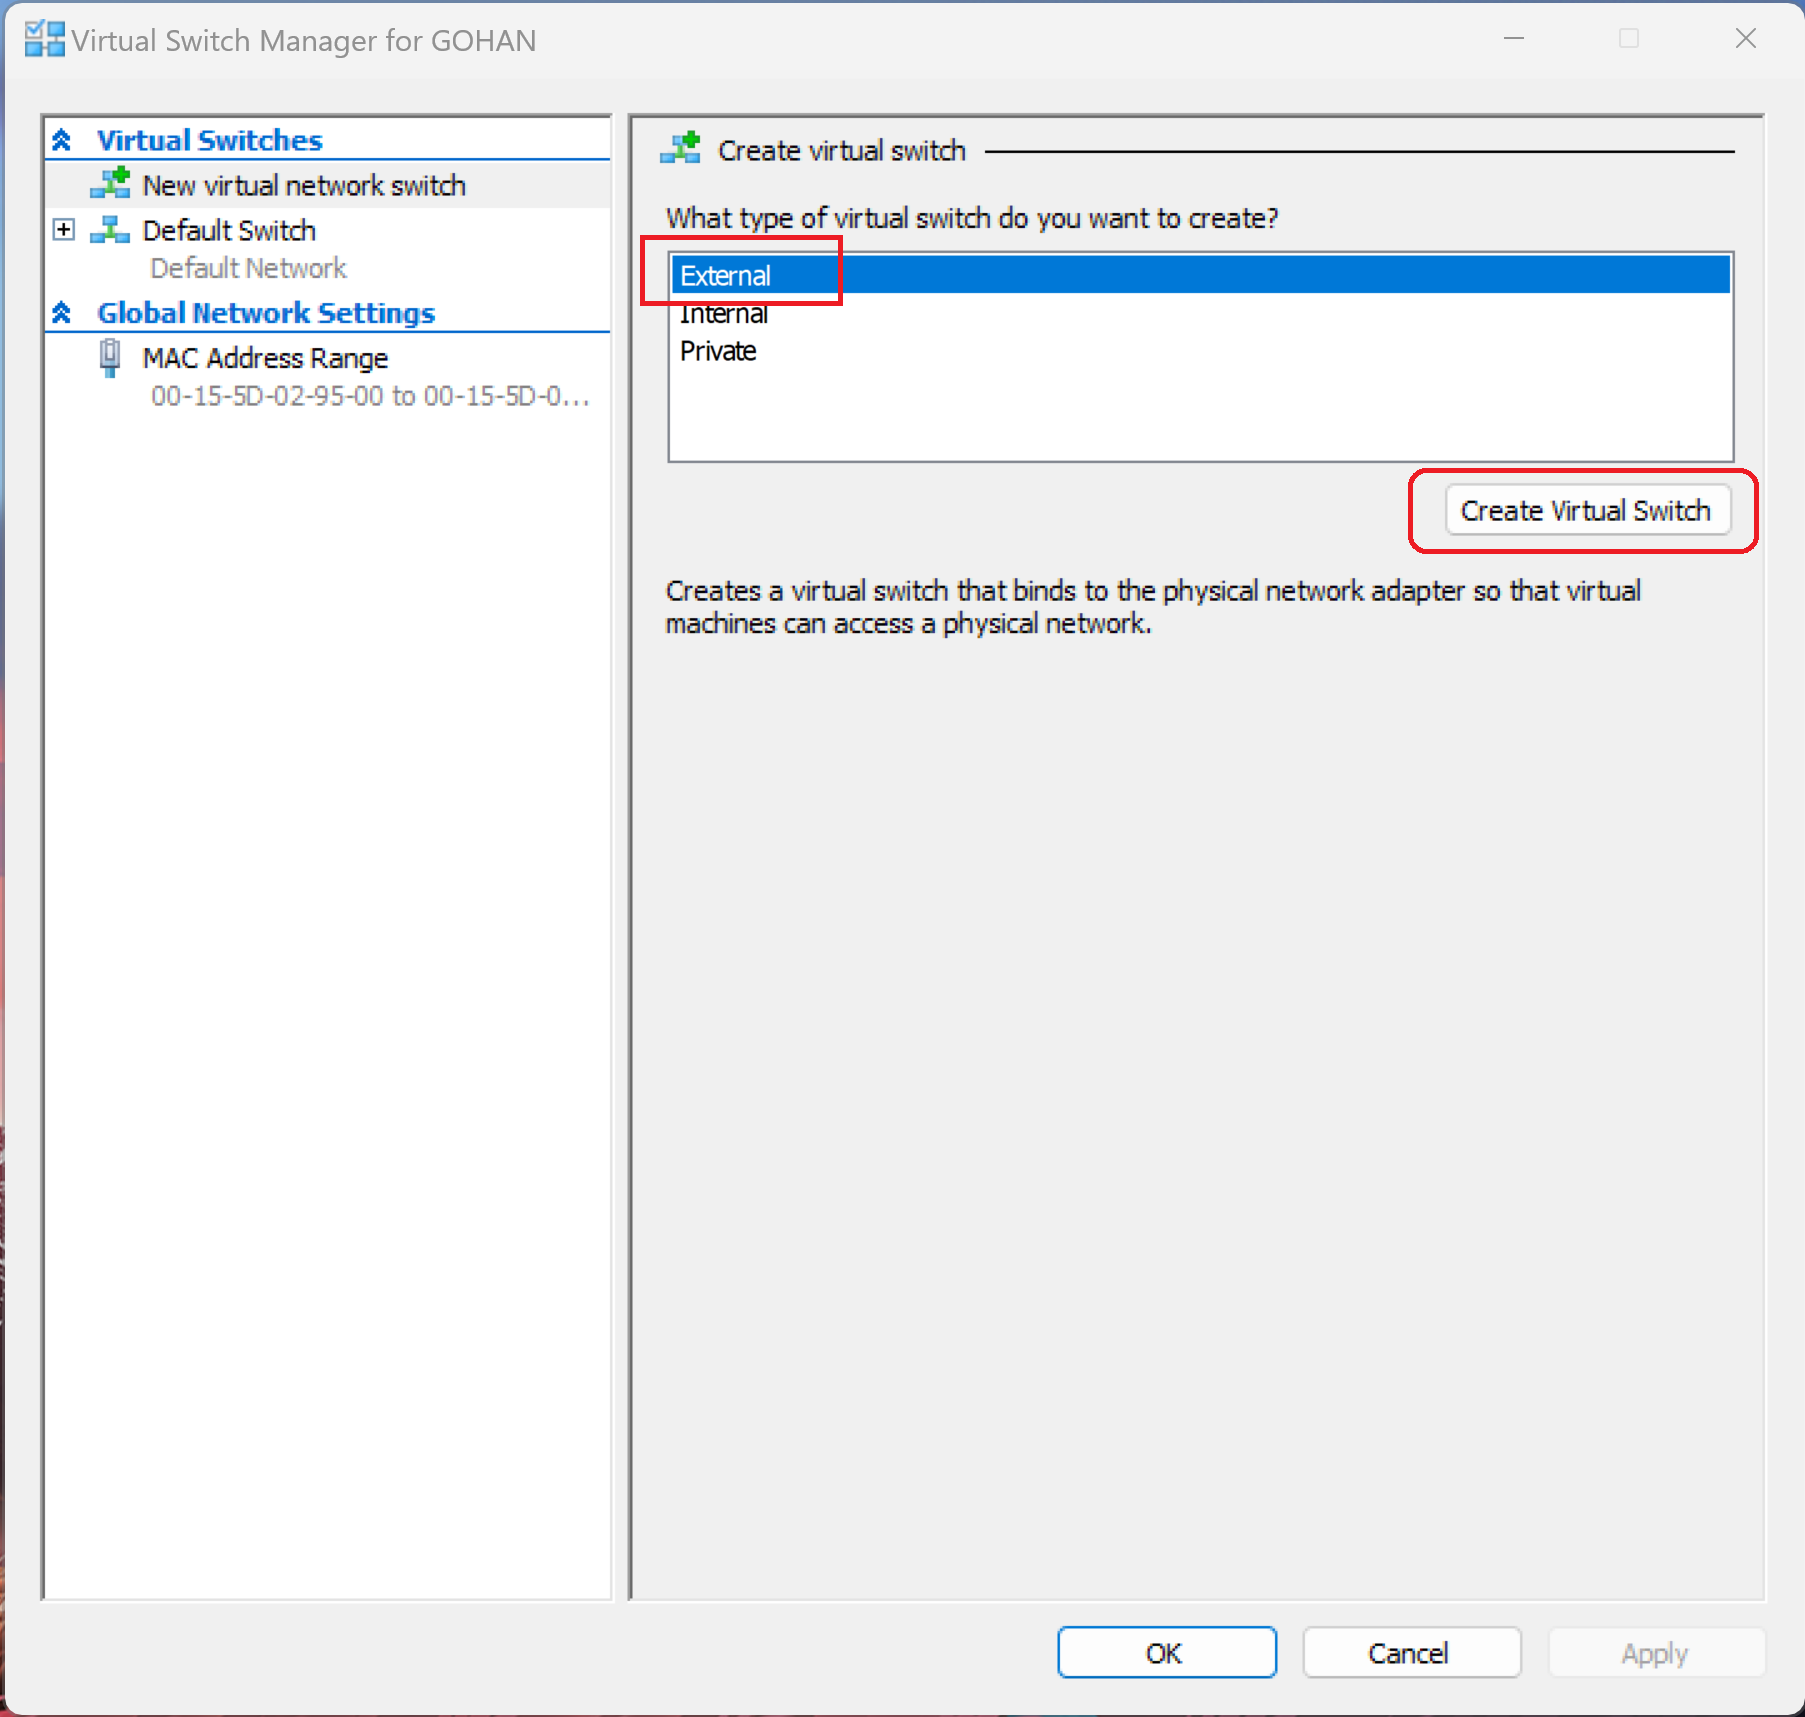
The Virtual Switch Manager window will now appear. Under “Create virtual switch” make sure to have the “External” option selected, then click the “Create Virtual Switch” button.
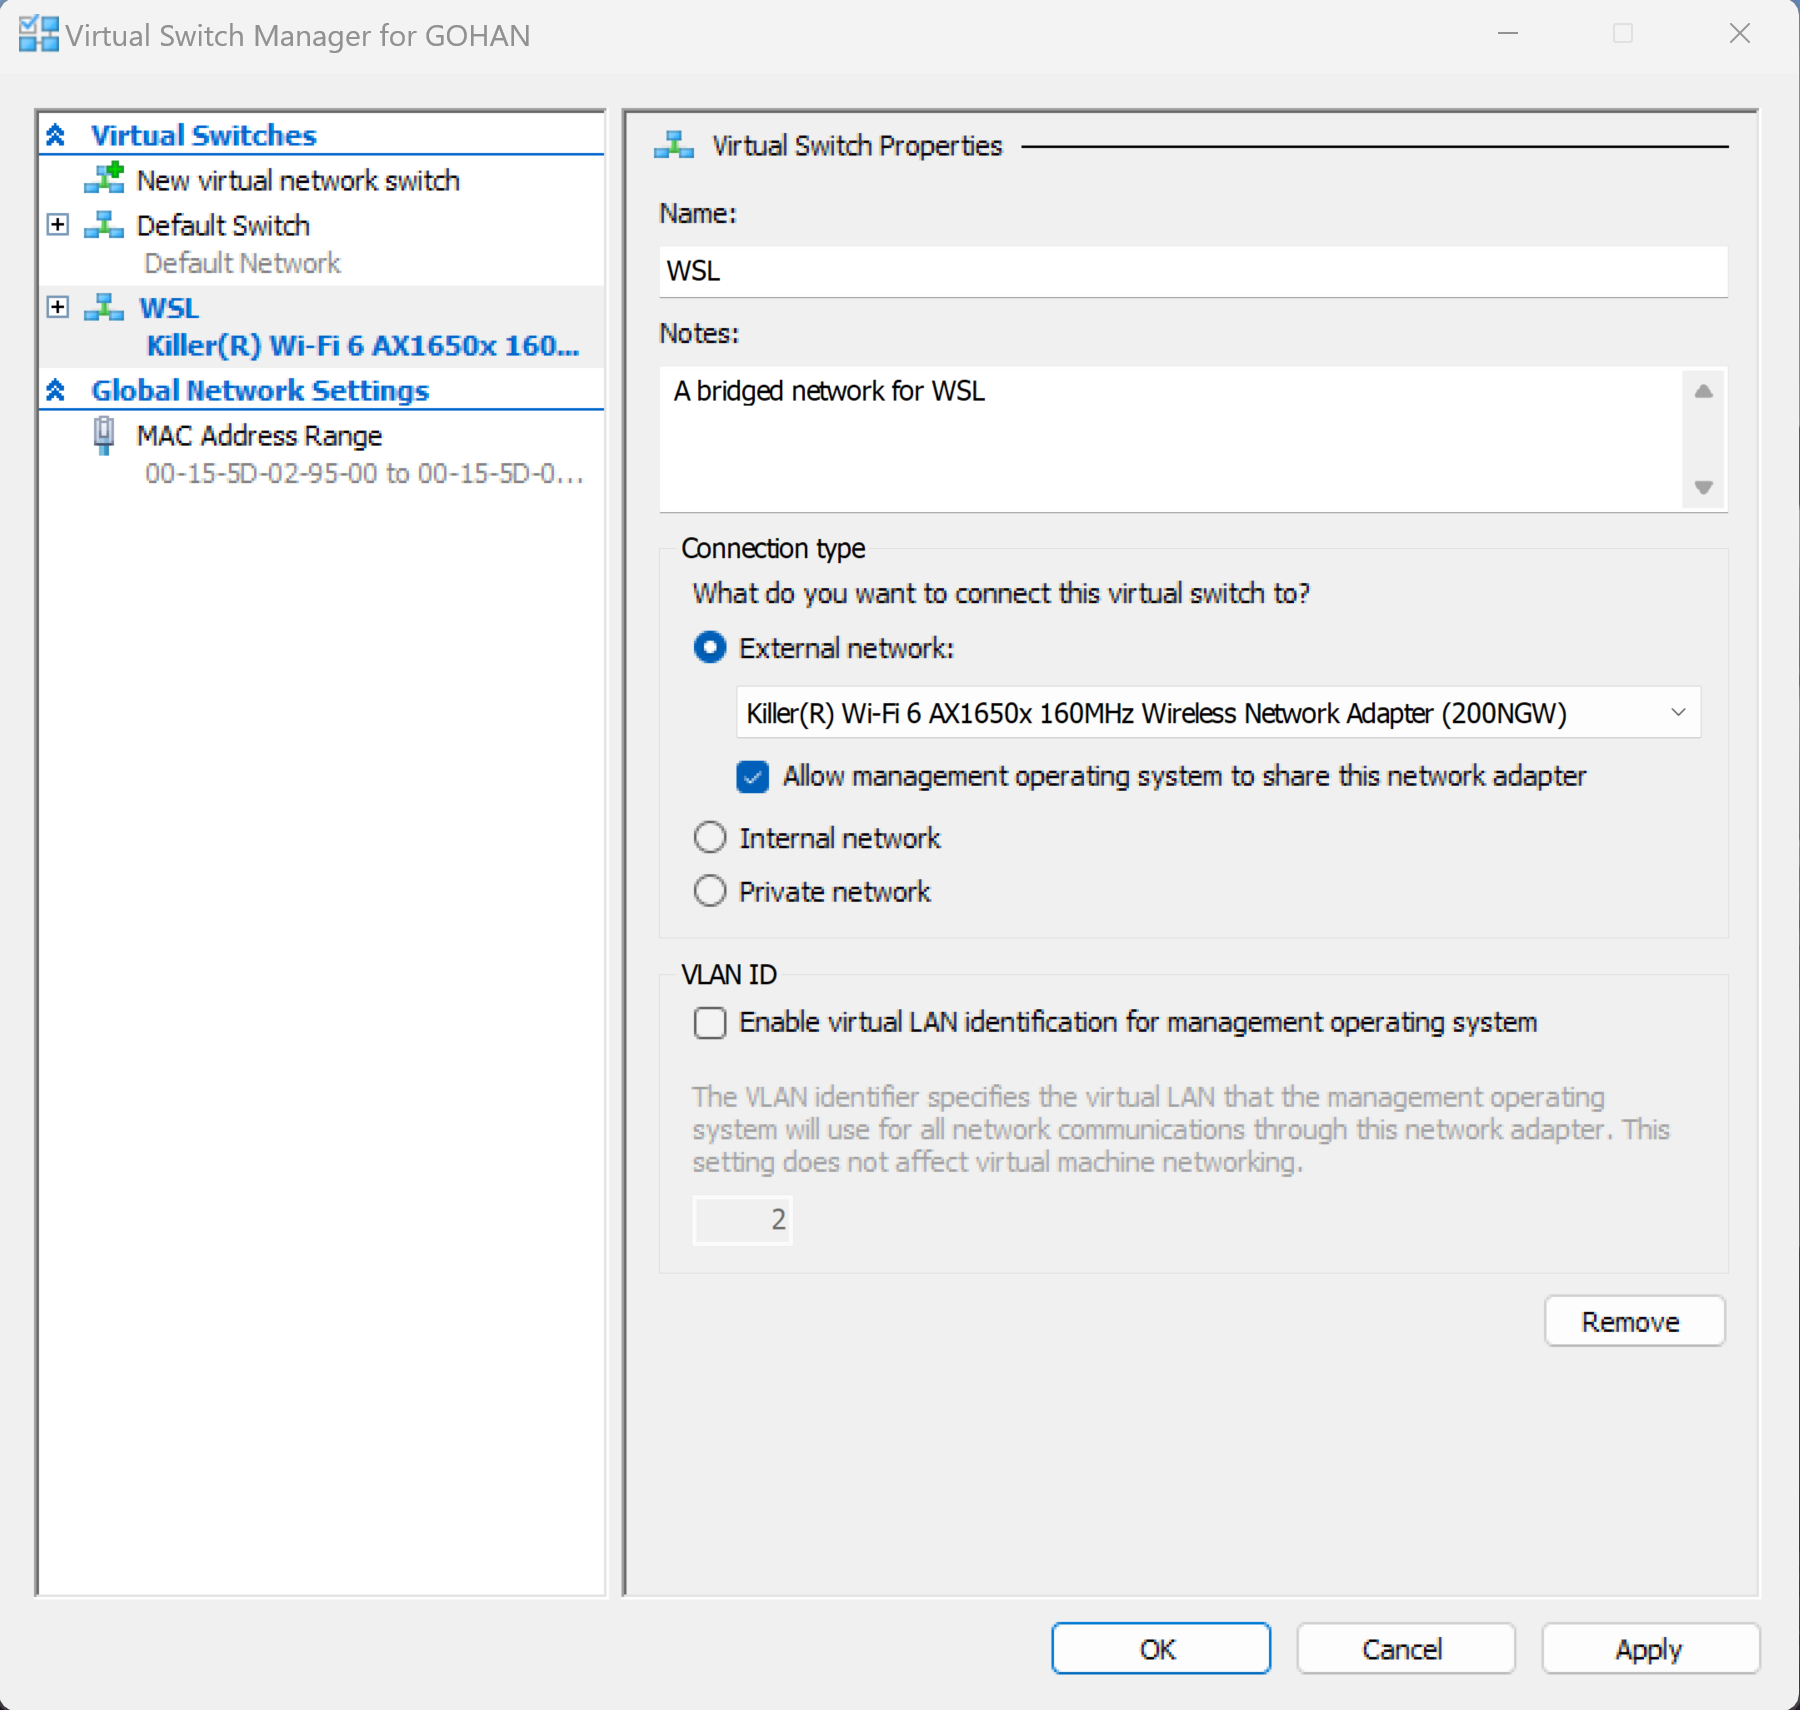
On the next screen, you will need to provide a name for the switch, the name is important as we will use it later on. The External Network has been chosen, I would leave it alone, just make sure that the checkbox “Allow management operating system to share this network adapter” is checked, then click on the “Apply” button.
A new window will appear giving a warning about the network being disrupted due to this change. Click “Yes” to continue.
After the Switch has been created, click the OK button.
Congratulations, you have successfully configured your Hyper-V switch. You can confirm by going to the networks view, there should be a new adapter listed called Network Bridge as seen in the image below.

WSL
Now that the network bridge has been created WSL needs to be updated to use the bridge. On windows use File Explorer to navigate to %UserProfile%, this is where the file .wslconfig needs to be placed. In case you are not aware, the file .wslconfig is used to configure global settings for WSL regardless of distro.
If you already have a .wslconfig file, open it up, if not, create a new file. Add the following content at the end of the file.
| |
Where WSL, the name of the switch created in the Hyper-V manager is assigned to vmSwitch. If you don’t remember the name open Hyper-V manager again or run the following command from Powershell as an admin.
| |
Here is the result of that command on my system.
| |
After applying the new settings to the .wslconfig file restart WSL using the following command from Powershell
| |
Open a new WSL shell instance and run the following command.
| |
In the output, look for the value of eth0.
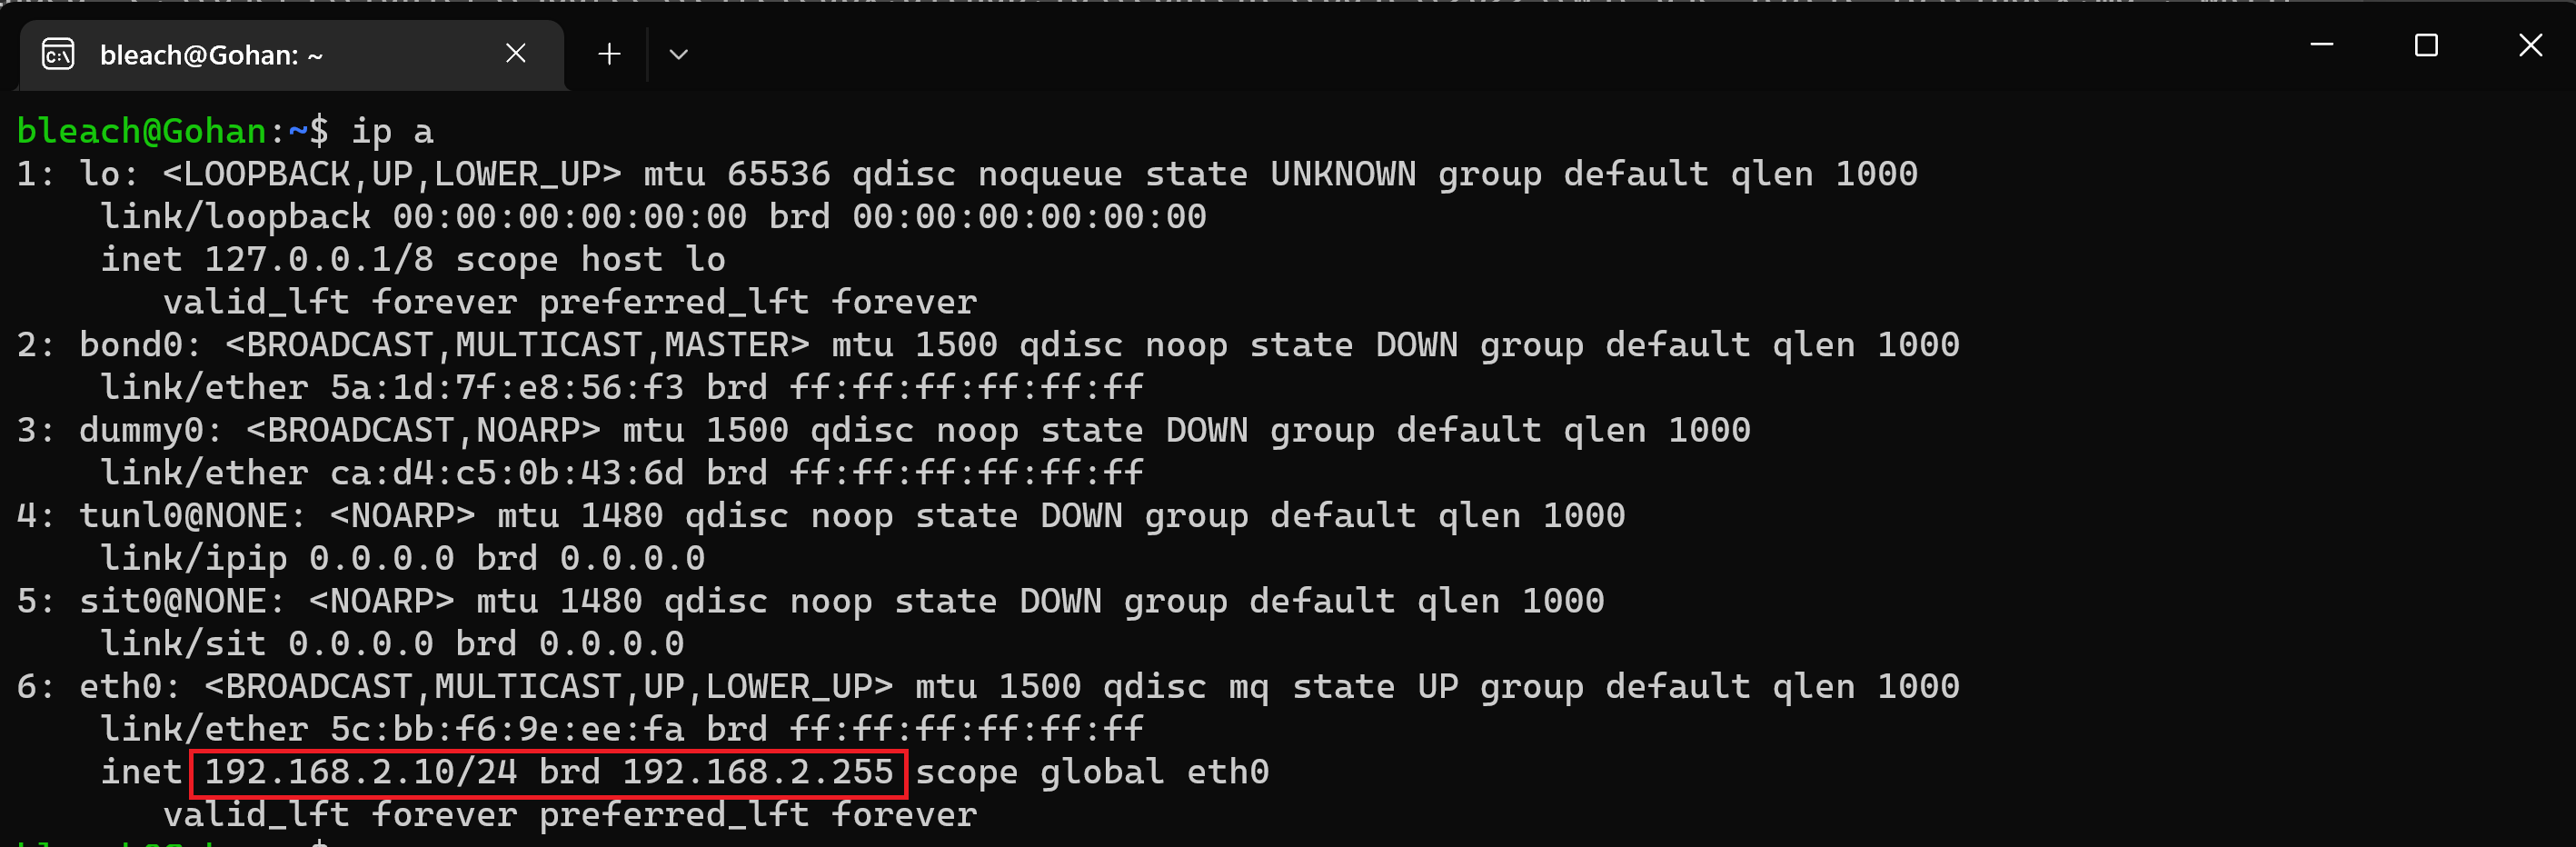
This is the new static IP that WSL will have. You can confirm that the IP does not change by restarting WSL again or by shutting down Windows.
Great, with a static IP we can now configure the Kubernetes load balancer.
Kubernetes
As shown on my Kubernetes In WSL - Connect to a service from Windows we can use MetalLB to create a load balancer.
First, grab the WSL IP, for me, it is now 192.168.2.10, I will increment the last octet by 1 to not conflict with the node’s IP address.
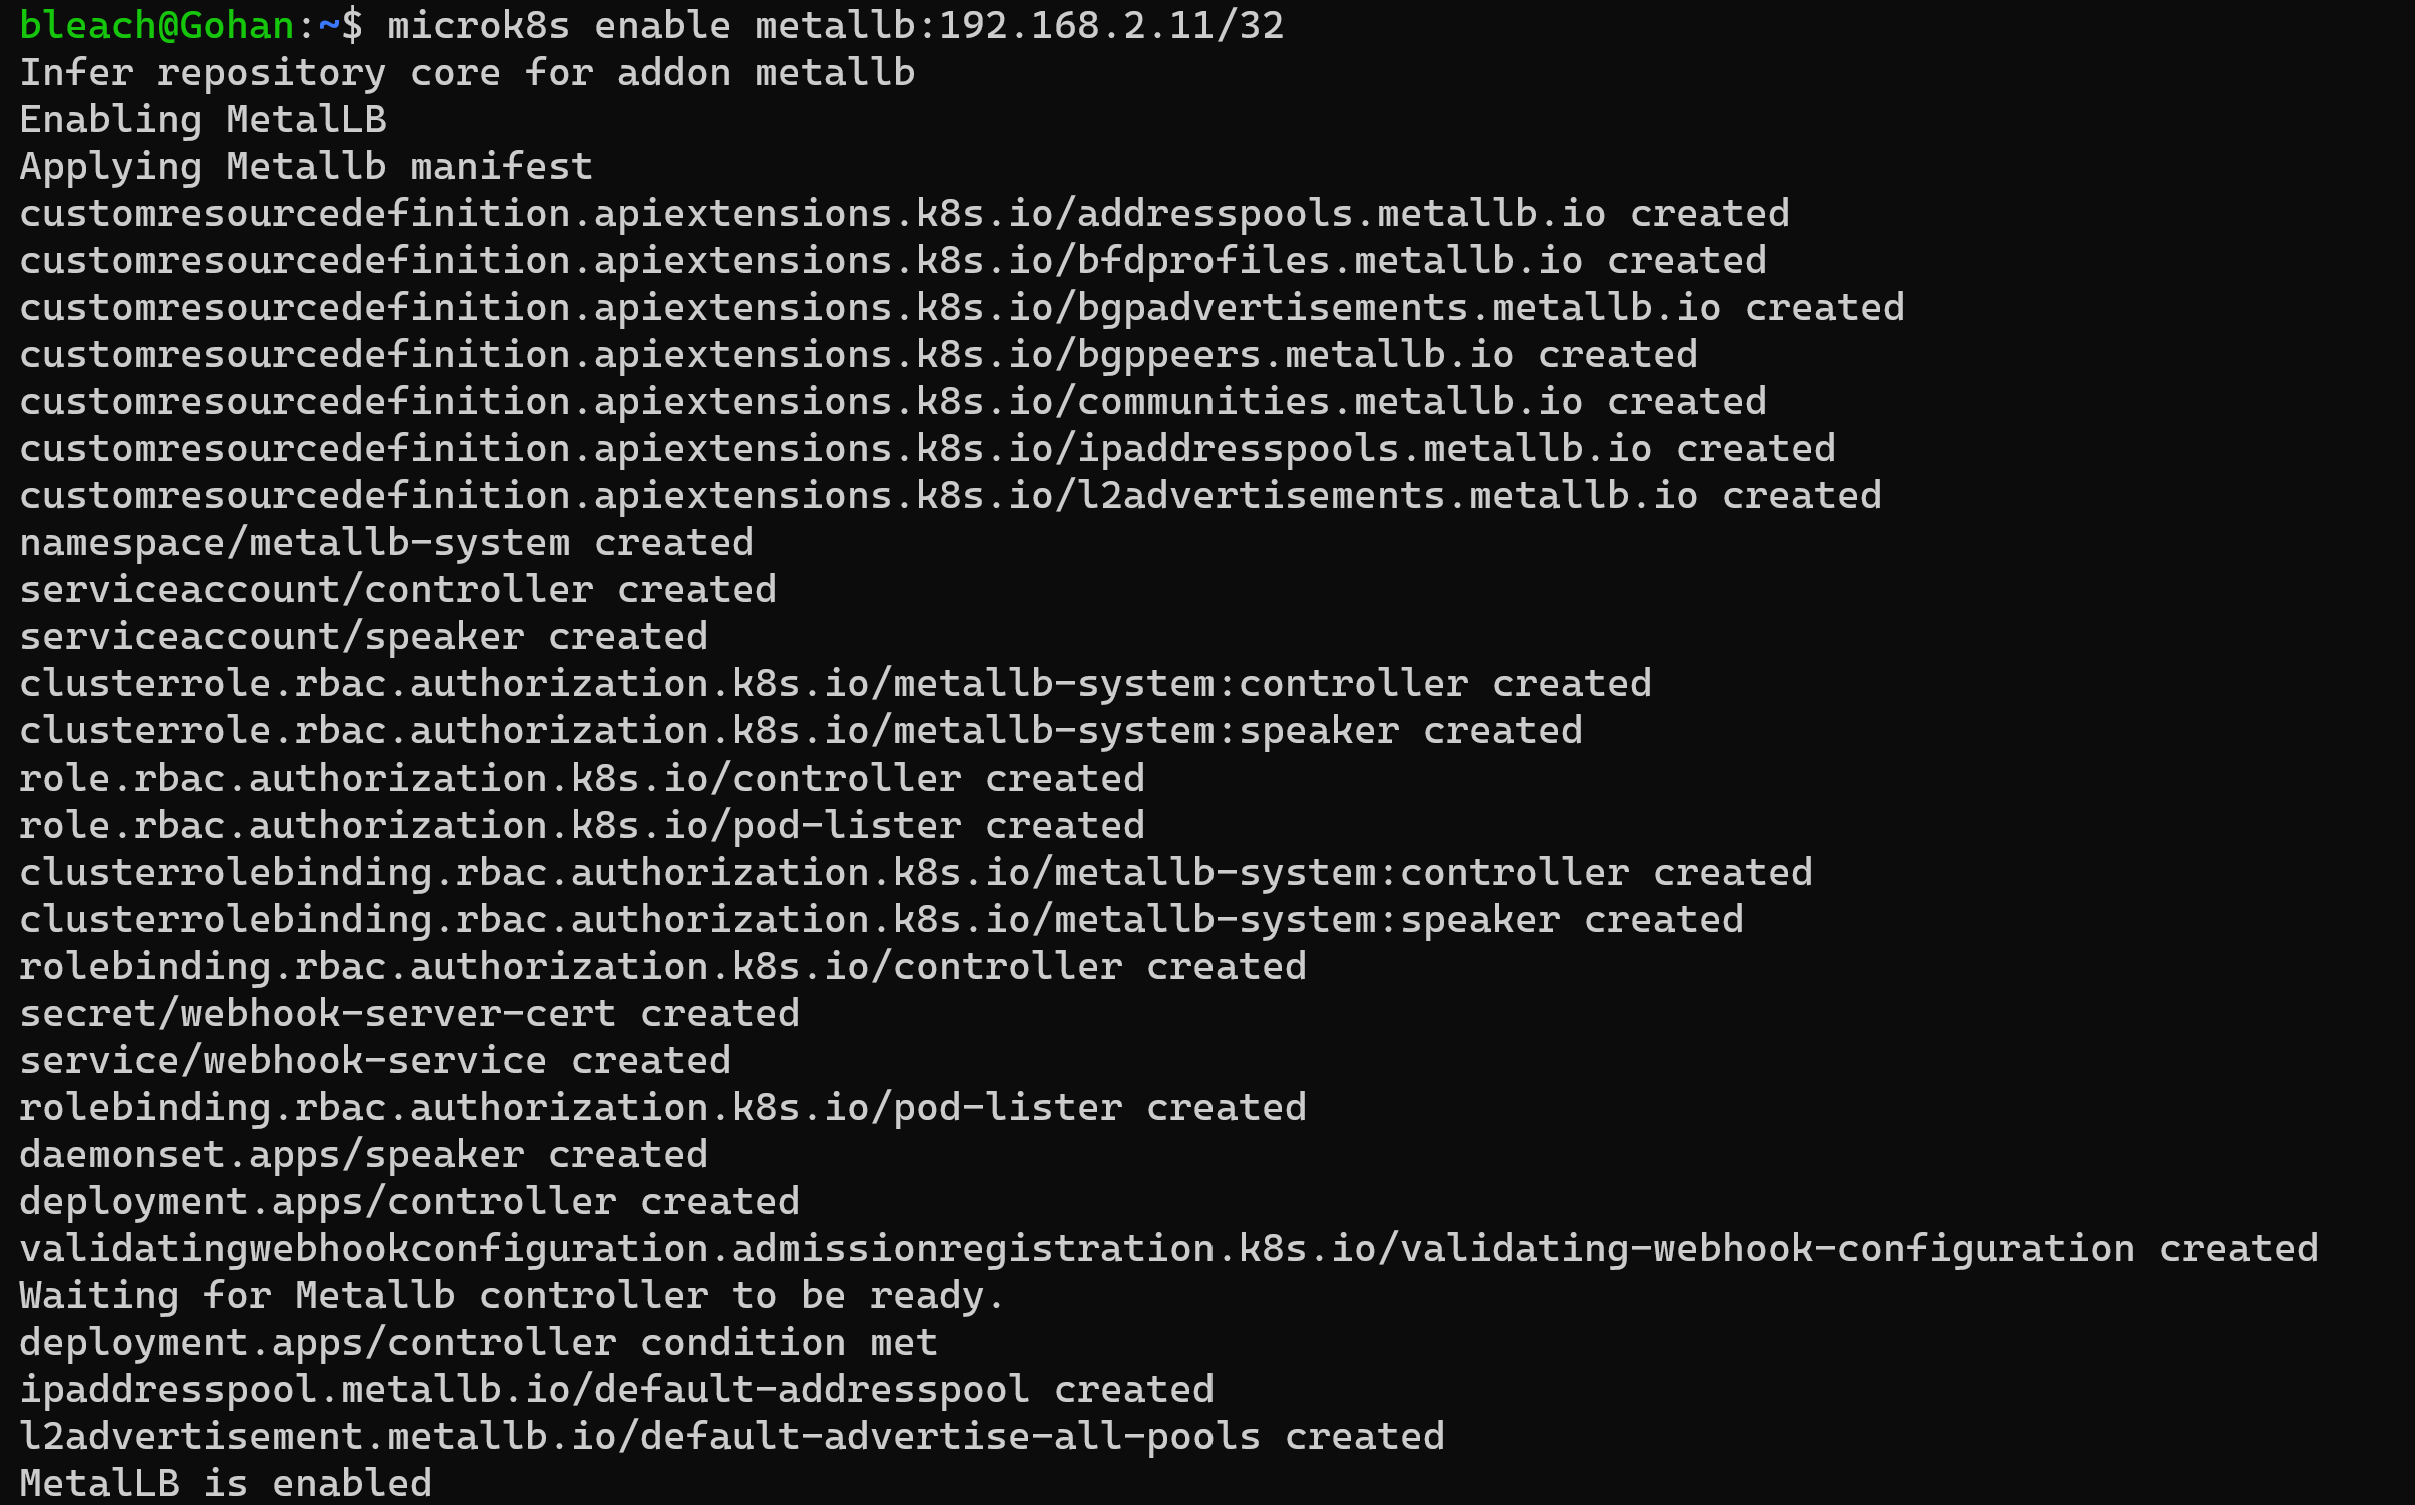
In WSL, enable MetalLB using the following command.
| |
/32 at the end of the IP is used here to keep the load balancer IP static. If you don’t understand why then may I suggest watching Understanding CIDR Ranges and dividing networks
Once MetalLB is ready, you can serve traffic to a load balancer.
For example, take the following YAML obtained from the official Kubernetes docs.
| |
You can deploy the Nginx deployment by running the following command.
| |
Then expose the service created using the following command.
| |
If you run the following command.
| |
You will see that the Nginx service created was assigned an external IP, the load balancer’s IP.

Moment of truth, can we reach this Nginx service running on http://192.168.2.11:31080 from Windows.
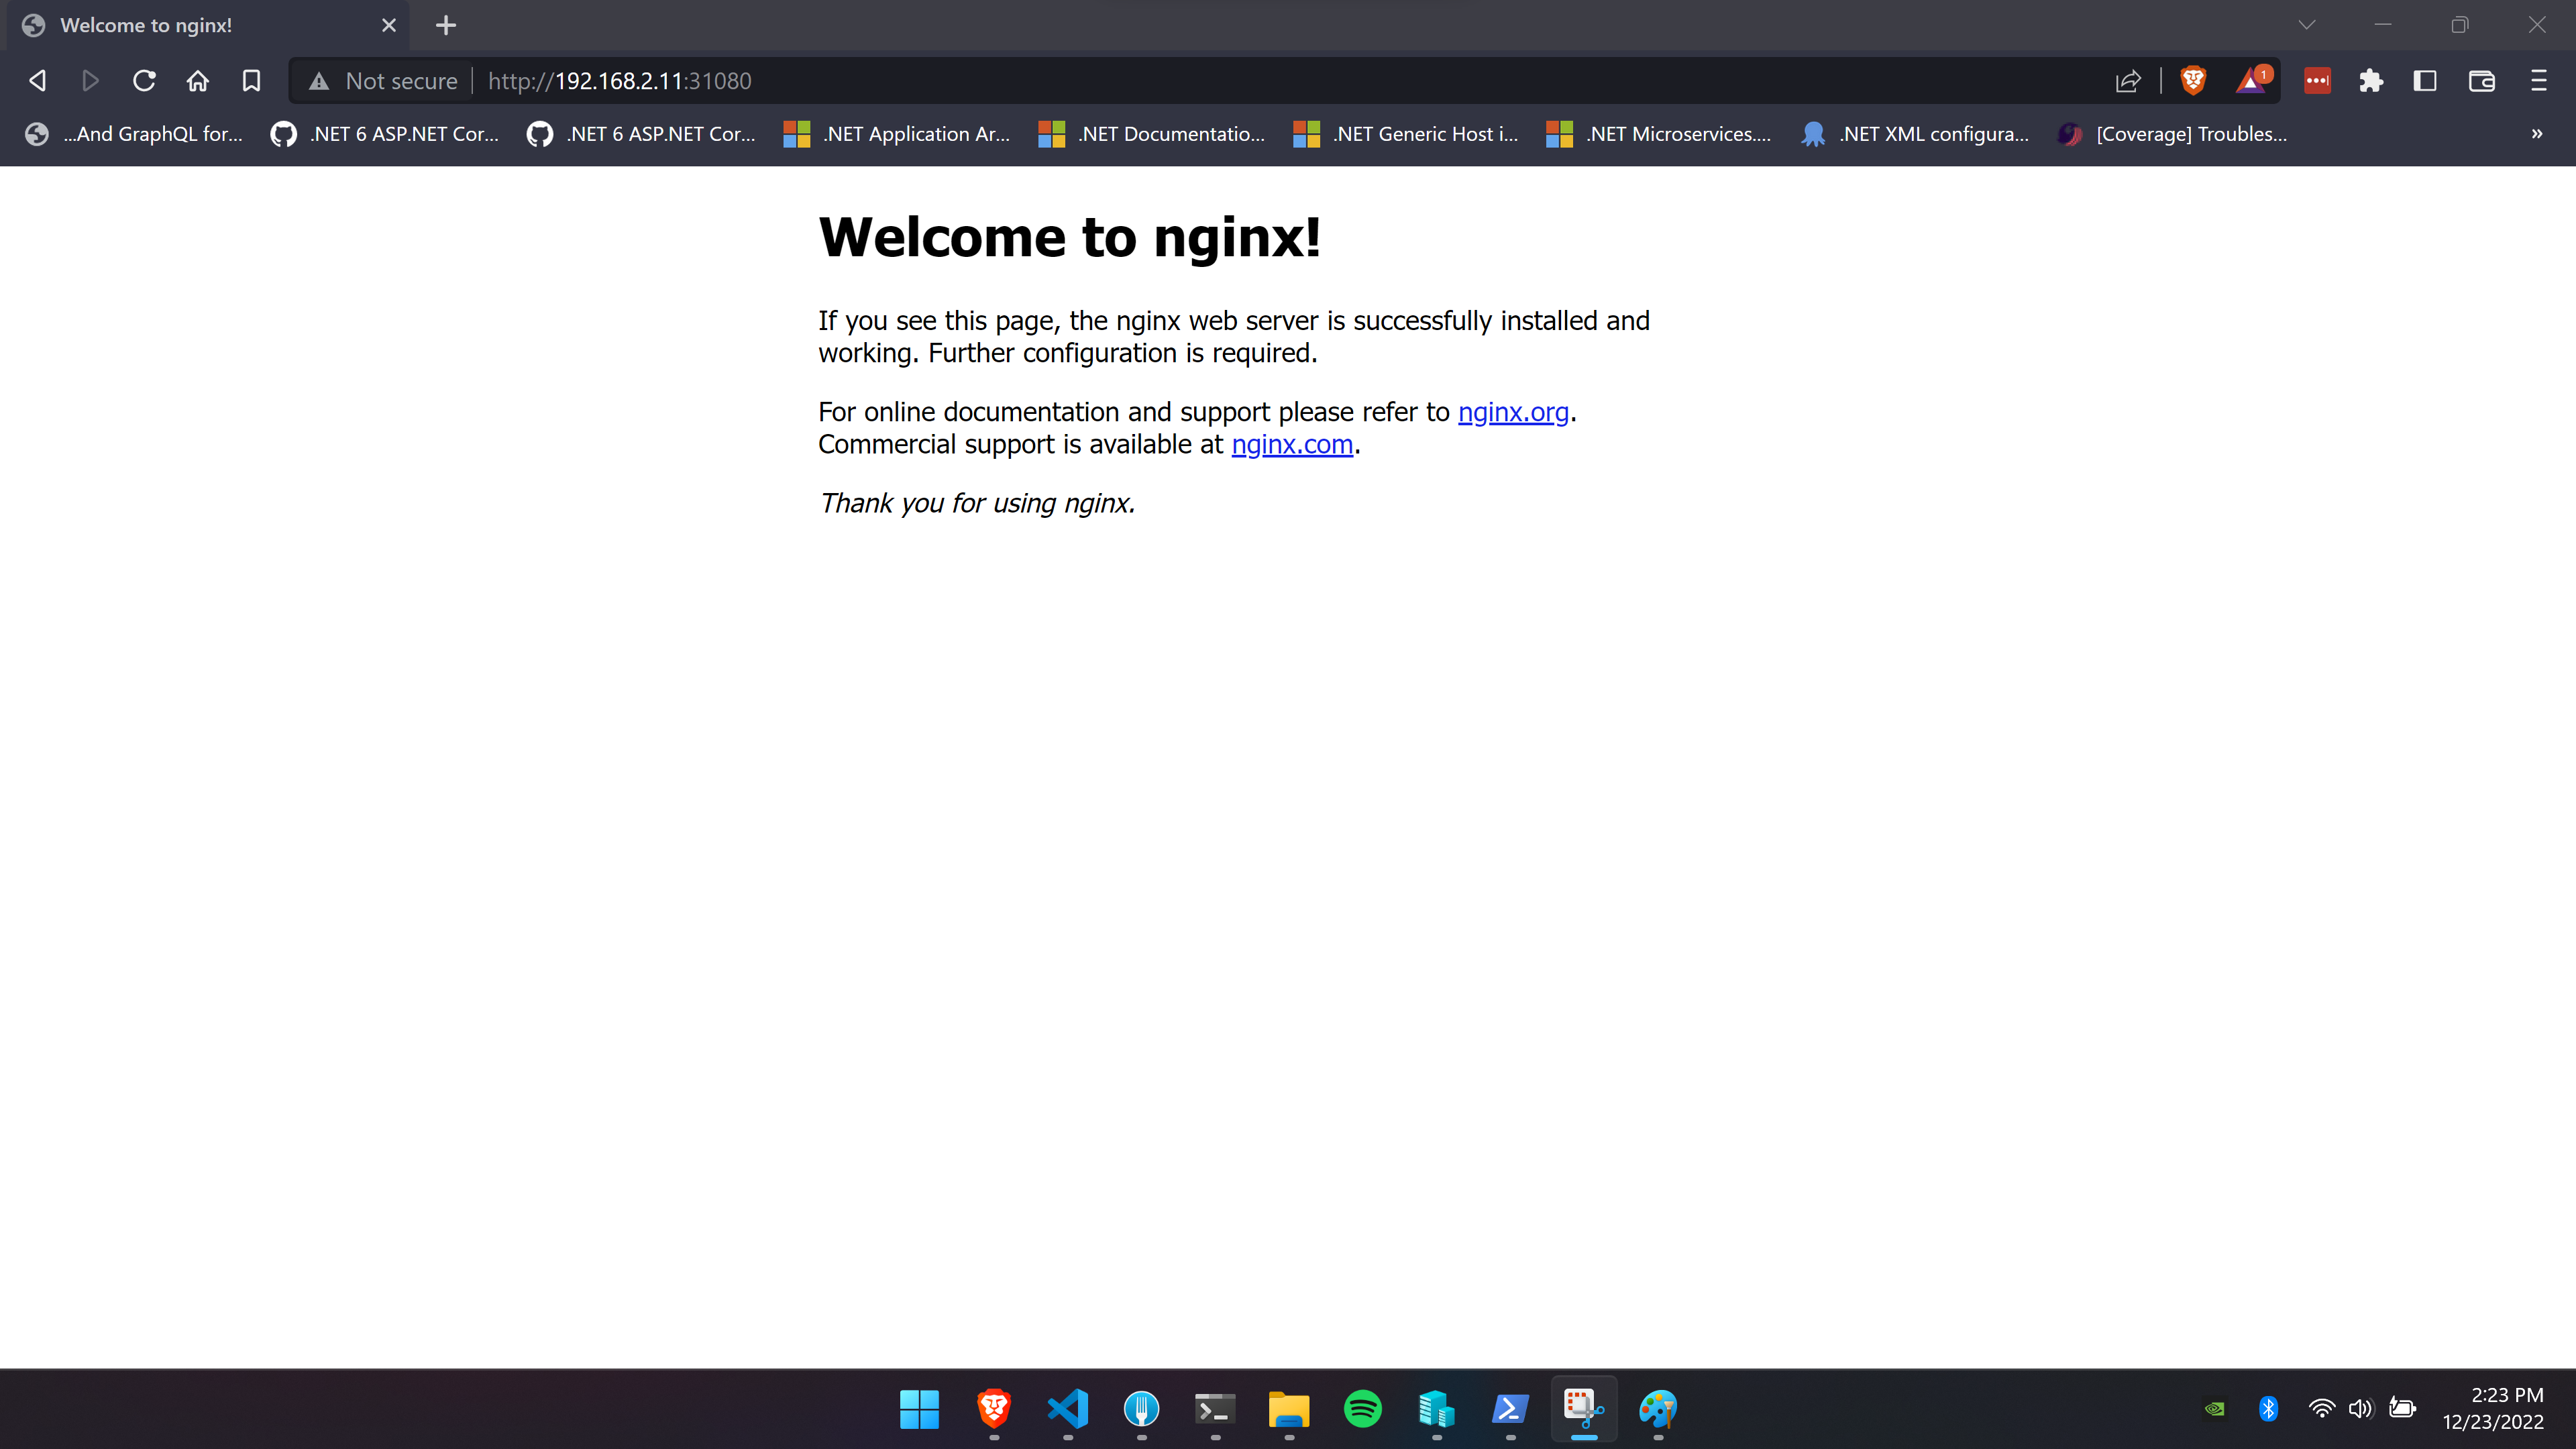
We can! The service can be reached from Windows.
As mentioned in Kubernetes In WSL - Connect to a service from Windows we can change the Windows host file by adding the load balancer IP and mapping to a domain. Remember you cannot map the load balancer IP to localhost but you could map it to something like www.localhost.com or local.host. If you really wish to access the Kubernetes service using localhost then may I suggest using a port proxy from Windows to WSL.
localhost
To use localhost in Windows, you can create a port proxy from Windows to WSL using the following command from an admin shell.
| |
Here, I’m port proxying traffic on port 31080 on Windows localhost, 0.0.0.0 to port 31080 on 192.168.2.11, my load balancer IP. This will allow me to access the service using http://localhost:31080/ from Windows as shown on the screen below.

Conclusion
Having a static IP on WSL makes Kubernetes development in WSL so much easier, being able to connect a service running on Windows to a service running on Kubernetes is an awesome feature to have.
Quick warning, if you restart Windows, the configuration above will continue to work but I have noted that Kubernetes takes a few minutes to accept traffic again from Windows. Not exactly sure as to why, if you are in hurry simply open WSL and ping the service directly from within WSL.
Hope this post helped you get load balancing working for Kubernetes in WSL.
This will be my last post for 2022, see you next year.