Introduction

I have been spending my last few weeks sharpening up my Kubernetes skills, one area that I focused on was how to enable and use a Service Mesh in Kubernetes. A service mesh is a layer in your infrastructure that enables control of inbound and outboard traffic. It controls the traffic of any app or service that uses the network.

Kubernetes offers a wide range of Service Meshes, in this blog post I am going to concentrate on HashiCorp’s service mesh offering, Consul, though you may see other refer to it as Consul Connect, Consul Connect is a set of features that were added to Consul was in 2018 to enable service mesh support.

These features consist of three parts, first, the Consul server component, the Consul client, and the sidecars that are deployed. The server component is responsible for persisting data, i.e. configurations, thus requiring high availability, don’t run a single Consul Server in a Production environment. The client component resides in your node, it is responsible for reporting the health of each service running on your node as well as keeping track of the health of other services in other nodes. The client sends this information back to the Consul server component. Another responsibility of the client is to configure and manage all sidecars. The sidecars are responsible for intercepting inbound and outbound network traffic through a proxy, Consul leverages Envoy to achieve this feature.

I have prepared two sample applications to demo how you can configure and use Consul as a Service Mesh in Kubernetes. The first app will be a frontend application written in Blazor, the second app will be a Web API written in .NET 6 using minimal APIs. The Blazor application will call the Web API to get a weather forecast, there will be no data validation, authentication or authorization in the apps since the main focus of this post is to show how to use Consul.

Web API

The Web API is written using the new Minimal APIs feature offered by .NET. The API generates an in-memory collection of WeatherForecast, the entire API can be configured as shown below.

 1
 2
 3
 4
 5
 6
 7
 8
 9
10
11
12
13
14
15
16
17
18
19
20
21
22
23
24
25
26
27
28
29
30
31
32
33
34
35
36
37
38
namespace BackendApp
{
    public class Program
    {
        public static void Main(string[] args)
        {
            var builder = WebApplication.CreateBuilder(args);

            // Learn more about configuring Swagger/OpenAPI at https://aka.ms/aspnetcore/swashbuckle
            builder.Services.AddEndpointsApiExplorer();
            builder.Services.AddSwaggerGen();

            var app = builder.Build();
            app.UseHttpsRedirection();
            var summaries = new[]
            {
            "Freezing", "Bracing", "Chilly", "Cool", "Mild", "Warm", "Balmy", "Hot", "Sweltering", "Scorching"
            };

            app.MapGet("/weatherforecast", (HttpContext httpContext) =>
            {
                var forecast = Enumerable.Range(1, 5).Select(index =>
                    new WeatherForecast
                    {
                        Date = DateOnly.FromDateTime(DateTime.Now.AddDays(index)),
                        TemperatureC = Random.Shared.Next(-20, 55),
                        Summary = summaries[Random.Shared.Next(summaries.Length)]
                    })
                    .ToArray();
                return forecast;
            })
            .WithName("GetWeatherForecast")
            .WithOpenApi();

            app.Run();
        }
    }
}

In the code above, the router handler MapGet is used to map incoming HTTP requests whenever the incoming router matches “/weatherforecast”.

API Docker File

To be able to run the API in Kubernetes I will need to containerize the app, the following Docker file should do the trick.

 1
 2
 3
 4
 5
 6
 7
 8
 9
10
11
12
13
14
15
16
17
18
19
FROM mcr.microsoft.com/dotnet/aspnet:7.0 AS base
WORKDIR /app
EXPOSE 80

FROM mcr.microsoft.com/dotnet/sdk:7.0 AS build
WORKDIR /src
COPY ["App/BackendApp.csproj", "App/"]
RUN dotnet restore "App/BackendApp.csproj"
COPY . .
WORKDIR "/src/App"
RUN dotnet build "BackendApp.csproj" -c Release -o /app/build

FROM build AS publish
RUN dotnet publish "BackendApp.csproj" -c Release -o /app/publish /p:UseAppHost=false

FROM base AS final
WORKDIR /app
COPY --from=publish /app/publish .
ENTRYPOINT ["dotnet", "BackendApp.dll"]

Then to build the container image with Docker execute the following command.

1
docker build . -f App/Dockerfile -t backend:1.0.0

The dot after the build command refers to the current working directory, the -f is the path to the Docker file and the -t command sets a tag, in my case I decided to append version 1.0.0 to my app. After executing the command above, run the following command to confirm the image was created.

1
2
3
$ docker image ls
REPOSITORY   TAG      IMAGE ID       CREATED          SIZE
backend      1.0.0    f20ce50a5b86   39 seconds ago   216MB

Blazor App

Next up, I have created a frontend application base on Blazor, the app uses the default Blazor template, and as part of the template, Blazor adds a weather forecast page. The data displayed is loaded from an in-memory collection. I am going to change the application to load the data from the Web API created above.

This is the WeatherForecastService that comes from the Blazor template.

 1
 2
 3
 4
 5
 6
 7
 8
 9
10
11
12
13
14
15
16
public class WeatherForecastService
{
    private static readonly string[] Summaries = new[]
    {
    "Freezing", "Bracing", "Chilly", "Cool", "Mild", "Warm", "Balmy", "Hot", "Sweltering", "Scorching"
};
    public Task<WeatherForecast[]> GetForecastAsync(DateOnly startDate)
    {
        return Task.FromResult(Enumerable.Range(1, 5).Select(index => new WeatherForecast
        {
            Date = startDate.AddDays(index),
            TemperatureC = Random.Shared.Next(-20, 55),
            Summary = Summaries[Random.Shared.Next(Summaries.Length)]
        }).ToArray());
    }
}

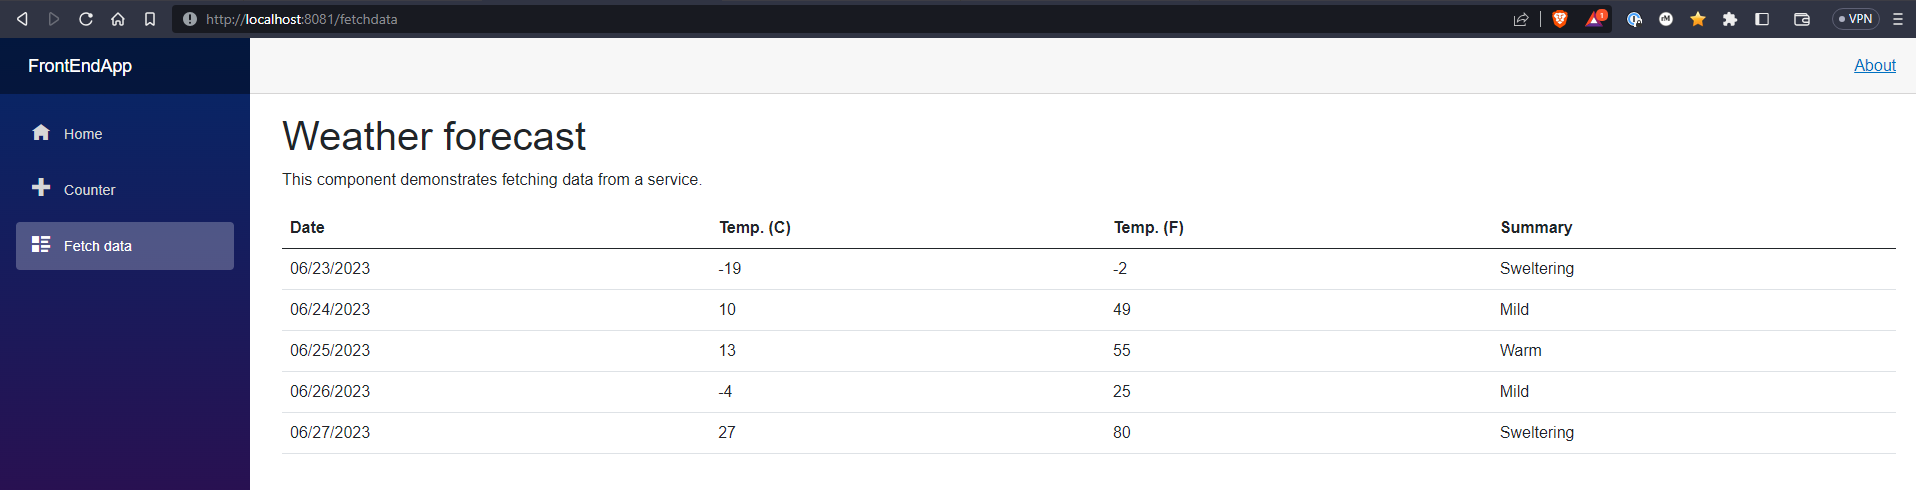
If you were to run the app and navigate to the forecast page you would see something similar to what is being shown on the screenshot below.

Weather Forecast Page

I’ll need to refactor the GetForecastAsync method to use an HTTP client to make an API request to the Web API endpoint, https://localhost:7043/weatherforecast, to retrieve the WeatherForecast data from the API

 1
 2
 3
 4
 5
 6
 7
 8
 9
10
11
12
namespace FrontEndApp.Data
{
    public class WeatherForecastService
    {
        public async Task<WeatherForecast[]> GetForecastAsync()
        {
            var httpClient = new HttpClient();
            var weatherForecastCollection = await httpClient.GetFromJsonAsync<WeatherForecast[]>("https://localhost:7043/weatherforecast");
            return weatherForecastCollection;
        }
    }
}

The code above will establish a dependency between the Web API and the Blazor App, the two apps now communicate through the network, once I introduce Consul into the mix, I will show how the network communication between these two apps can be secured by simply installing a Service Mesh.

Blazor Docker File

Just like the Web API, I will need to containerize the Blazor app, the following Docker file should do the trick.

 1
 2
 3
 4
 5
 6
 7
 8
 9
10
11
12
13
14
15
16
17
18
19
FROM mcr.microsoft.com/dotnet/aspnet:7.0 AS base
WORKDIR /app
EXPOSE 80

FROM mcr.microsoft.com/dotnet/sdk:7.0 AS build
WORKDIR /src
COPY ["App/FrontEndApp.csproj", "App/"]
RUN dotnet restore "App/FrontEndApp.csproj"
COPY . .
WORKDIR "/src/App"
RUN dotnet build "FrontEndApp.csproj" -c Release -o /app/build

FROM build AS publish
RUN dotnet publish "FrontEndApp.csproj" -c Release -o /app/publish /p:UseAppHost=false

FROM base AS final
WORKDIR /app
COPY --from=publish /app/publish .
ENTRYPOINT ["dotnet", "FrontEndApp.dll"]

Then to build the container image with Docker execute the following command.

1
docker build . -f App/Dockerfile -t frontend:1.0.0

Again, the dot after the build command refers to the current working directory, the -f is the path to the Docker file and the -t command sets a tag, in my case I decided to append version 1.0.0 to my app. After executing the command above, run the following command to confirm the image was created.

1
2
3
$ docker image ls
REPOSITORY   TAG      IMAGE ID       CREATED          SIZE
frontend     1.0.0    f20ce50a5b86   4 seconds ago   216MB

Configuring Helm

I plan to use Helm to deploy my applications, Helm is the package manager for Kubernetes, it is a great tool to manage Kubernetes applications, you can use Helm to define, install and upgrade any Kubernetes application.

To use Helm I will need to create a Helm Chart for the frontend and backend application. Executing the following command will create a new helm chart.

1
helm create backendapp

Executing the command above will create a new chart titled “backendapp”, the chart is composed of a few files as seen on the folder tree below.

 1
 2
 3
 4
 5
 6
 7
 8
 9
10
11
12
13
14
15
16
17
18
19
20
21
22
23
24
25
26
27
28
Root
├── .vscode
│   └── settings.json
├── App
│   ├── appsettings.json
│   ├── BackendApp.csproj
│   ├── Dockerfile
│   ├── Program.cs
│   ├── Properties
│   │   └── launchSettings.json
│   └── WeatherForecast.cs
├── BackendApp.sln
└── Deploy
    └── backendapp
        ├── .helmignore
        ├── Chart.yaml
        ├── charts
        ├── templates
        │   ├── deployment.yaml
        │   ├── hpa.yaml
        │   ├── ingress.yaml
        │   ├── NOTES.txt
        │   ├── service.yaml
        │   ├── serviceaccount.yaml
        │   ├── tests
        │   │   └── test-connection.yaml
        │   └── _helpers.tpl
        └── values.yaml  #The file you provide to consumers of your chart.

The deploy folder is the root directory for all helm charts. Within that folder, you will find the chart.yaml file, this is where all chart metadata is placed i.e. chart name, the Charts folder is where you place any Charts that your Chart depends on. The template folder is the directory containing the files used to manifest your chart. It utilizes Go’s template language.

The chart needs a few updates, first in the Chart.yaml file, I will set the appVersion to 1.0.0, this is because the Docker image was tagged with 1.0.0 and in my values.yaml I left the tag value empty.

1
2
3
4
5
6
apiVersion: v2
name: backendapp
description: A Helm chart for Kubernetes
type: application
version: 0.1.0
appVersion: "1.0.0"

The next change required is to the values.yaml file, I need to change the repository as newly created Helm Charts look for Nginx by default. The name of my container image is backend, so that is the value I will use, see below.

1
2
3
4
5
image:
  repository: backendapp
  pullPolicy: IfNotPresent
  # Overrides the image tag whose default is the chart appVekubecrsion.
  tag: ""

The “pullPolicy” being set to “IfNotPresent” is important as it allows Helm to pull images from the local container registry.

No more changes are required for the backend Helm chart, next, I will create the Helm chart for the frontend using the following command.

1
helm create frontendapp

Just like the Web API, this will create a chart named “frontendapp under my deploy folder within the FrontendApp and just like the Web API I will need to update the values.yaml and chart.yaml files as shown below.

1
2
3
4
5
6
apiVersion: v2
name: frontendapp
description: A Helm chart for Kubernetes
type: application
version: 0.1.0
appVersion: "1.0.0"
1
2
3
4
5
image:
  repository: frontendapp
  pullPolicy: IfNotPresent
  # Overrides the image tag whose default is the chart appVekubecrsion.
  tag: ""

I’ll need to make an additional update to the Helm chart by changing the port forward from port 8080, the two apps could potentially run on the same node and run into a port collision, therefore, I will change the UI to port forward on 8081, you can do it manually on the terminal using the kubectl port forward but I am going to go ahead and modify the command on the notes.txt file.

Deploying App to Kubernetes

Time to use Helm to deploy both apps. First I am going to deploy the backend app using the following command.

1
helm install backendapp ./

The helm install command takes the name for the install, the chart, this can be a path and a set of flags, in the command above I am not providing any flags, just the name and the path to the chart, which is the current directory.

The output of that command should be the values found in notes.txt, as shown below.

1
2
3
4
export POD_NAME=$(kubectl get pods --namespace default -l "app.kubernetes.io/name=backendapp,app.kubernetes.io/instance=backendapp" -o jsonpath="{.items[0].metadata.name}")
export CONTAINER_PORT=$(kubectl get pod --namespace default $POD_NAME -o jsonpath="{.spec.containers[0].ports[0].containerPort}")
echo "Visit http://127.0.0.1:8080 to use your application"
kubectl --namespace default port-forward $POD_NAME 8080:$CONTAINER_PORT

Run each of the following commands to being port forwarding from port 8080 on your machine to port 80 on the container.

1
2
Forwarding from 127.0.0.1:8080 -> 80
Forwarding from [::1]:8080 -> 80

Great, I should be able to send the following curl command and get a successful response from the API.

1
2
3
curl -X 'GET' \
  'http://localhost:8080/weatherforecast' \
  -H 'accept: application/json'

The command above yields the following response from the API.

 1
 2
 3
 4
 5
 6
 7
 8
 9
10
11
12
13
14
15
16
17
18
19
20
21
22
23
24
25
26
27
28
29
30
31
32
[
  {
    "date": "2023-06-22",
    "temperatureC": -5,
    "temperatureF": 24,
    "summary": "Bracing"
  },
  {
    "date": "2023-06-23",
    "temperatureC": 14,
    "temperatureF": 57,
    "summary": "Scorching"
  },
  {
    "date": "2023-06-24",
    "temperatureC": 15,
    "temperatureF": 58,
    "summary": "Mild"
  },
  {
    "date": "2023-06-25",
    "temperatureC": 27,
    "temperatureF": 80,
    "summary": "Chilly"
  },
  {
    "date": "2023-06-26",
    "temperatureC": 46,
    "temperatureF": 114,
    "summary": "Bracing"
  }
]

Excellent, the API was deployed successfully and it is listening to the incoming requests, I don’t need to keep the port-forward proxy open so I’ll use CTRL+C to end the proxy.

Time to deploy the frontend app.

Just like before, execute the Helm install command.

1
helm install frontendapp ./

The command should yield something similar to the following.

 1
 2
 3
 4
 5
 6
 7
 8
 9
10
11
NAME: frontendapp
LAST DEPLOYED: Wed Jun 21 20:54:33 2023
NAMESPACE: default
STATUS: deployed
REVISION: 1
NOTES:
1. Get the application URL by running these commands:
   export POD_NAME=$(kubectl get pods --namespace default -l "app.kubernetes.io/name=frontendapp,app.kubernetes.io/instance=frontendapp" -o jsonpath="{.items[0].metadata.name}")
   export CONTAINER_PORT=$(kubectl get pod --namespace default $POD_NAME -o jsonpath="{.spec.containers[0].ports[0].containerPort}")
   echo "Visit http://127.0.0.1:8081 to use your application"
   kubectl --namespace default port-forward $POD_NAME 8081:$CONTAINER_PORT

Execute each of the commands from the notes to get the port-forwarding proxy going.

1
2
Forwarding from 127.0.0.1:8081 -> 80
Forwarding from [::1]:8081 -> 80

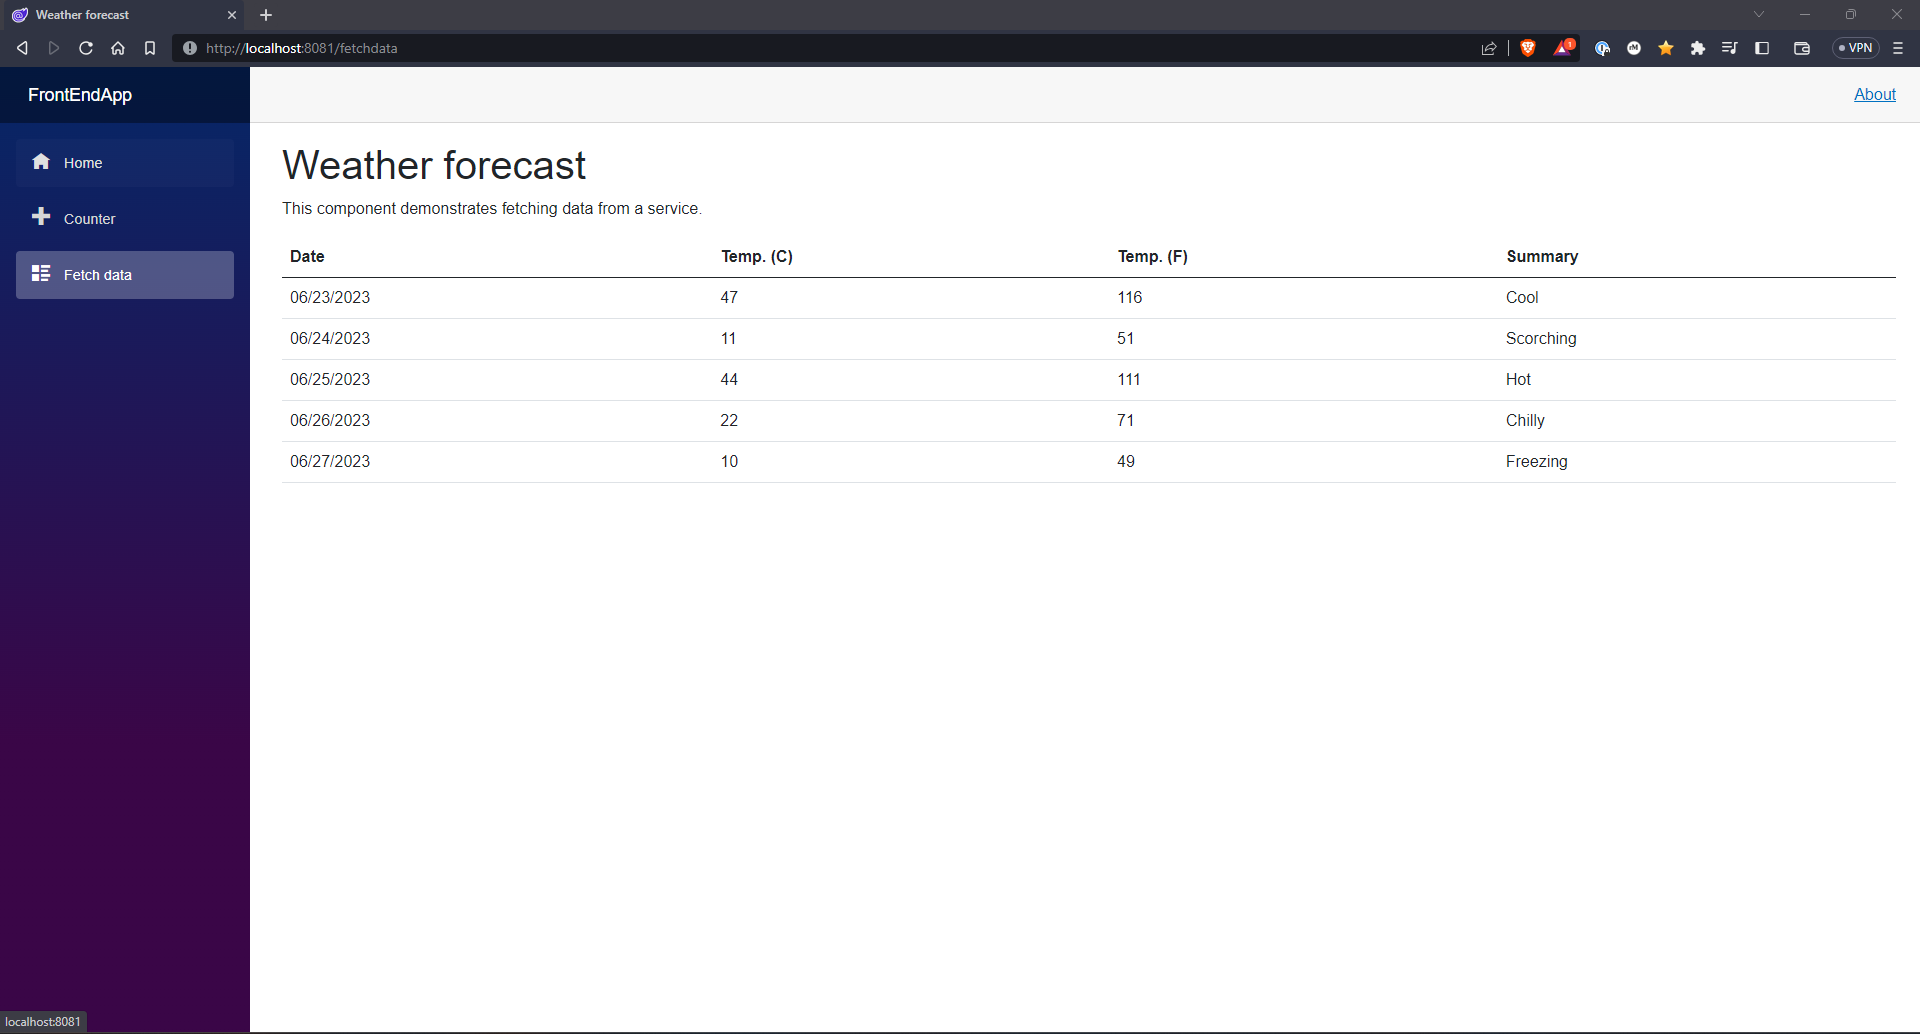
Great, let’s test it out, I should be able to open my browser to http://localhost:8081, then navigate to the Fetch Data page and see the randomly generate weather forecast create by the API.

Blazor in Kubernetes

As expected, it works, the Blazor App is running on Kubernetes and it is able to communicate with the Web API.

Now that we have the apps deployed and exchanging dates I’ll introduce Consul and configure it to control how the app communicate with each other.

Note: Not shown here, but the frontend required an additional update, the URL change from https://localhost:7043/weatherforecast to http://backendapp:80/weatherforecast that is because the frontend Pod talks to the backend pod though a Kubernetes Service name “backendapp”. This service was generated when the app was installed with Helm, see the service.yaml file under the templates folder.

Install Consul

You can install Consul using the Consul K8s CLI, the CLI makes it easy to get up and running, another option is to install Consul using Helm. That is the option that I will show here.

To install Consul using Helm you will need to add the HashiCorp Helm repository by running on the following command.

1
helm repo add hashicorp https://helm.releases.hashicorp.com

You should see the following as a confirmation.

1
"hashicorp" has been added to your repositories

With the HashiCorp Helm repo installed you can use the following command to install Consul, just don’t execute it yet.

1
helm install consul hashicorp/consul --set global.name=consul --create-namespace --namespace consul

The command above will install Consul but it does so with the default configurations, you can provide your own configurations by creating your own values.yaml. In a text editor, create a values.yaml file and add the following content to it.

 1
 2
 3
 4
 5
 6
 7
 8
 9
10
11
12
13
14
15
16
17
18
19
20
21
22
23
24
25
26
27
28
29
30
31
32
33
34
35
36
37
38
39
40
41
42
43
44
45
46
47
48
# Contains values that affect multiple components of the chart.
global:
  # The main enabled/disabled setting.
  # If true, servers, clients, Consul DNS and the Consul UI will be enabled.
  enabled: true
  # The prefix used for all resources created in the Helm chart.
  name: consul
  # The consul image version.
  image: hashicorp/consul:1.15.3
  # The name of the datacenter that the agents should register as.
  datacenter: dc1
  # Enables TLS across the cluster to verify authenticity of the Consul servers and clients.
  tls:
    enabled: true
  # Enables ACLs across the cluster to secure access to data and APIs.
  acls:
    # If true, automatically manage ACL tokens and policies for all Consul components.
    manageSystemACLs: true
  # Exposes Prometheus metrics for the Consul service mesh and sidecars.
  metrics:
    enabled: true
    # Enables Consul servers and clients metrics.
    enableAgentMetrics: true
    # Configures the retention time for metrics in Consul servers and clients.
    agentMetricsRetentionTime: "1m"
# Configures values that configure the Consul server cluster.
server:
  enabled: true
  # The number of server agents to run. This determines the fault tolerance of the cluster.
  replicas: 1
# Contains values that configure the Consul UI.
ui:
  enabled: true
  # Defines the type of service created for the Consul UI (e.g. LoadBalancer, ClusterIP, NodePort).
  # NodePort is primarily used for local deployments.
  service:
    type: NodePort
  # Enables displaying metrics in the Consul UI.
  metrics:
    enabled: true
    # The metrics provider specification.
    provider: "prometheus"
# Configures and installs the automatic Consul Connect sidecar injector.
connectInject:
  enabled: true
    # Enables metrics for Consul Connect sidecars.
  metrics:
    defaultEnabled: true

You can see the default values on the Consul chart by inspecting the Consul chart using the following command.

1
helm inspect values hashicorp/consul

Or you can visit the official Helm Chart Reference docs to see all the values that can be overwritten on your values.yaml file.

Now you can install Consul by executing the following command.

1
helm install consul hashicorp/consul --create-namespace --namespace consul --values values.yaml

Successful execution of the command above yields the following.

 1
 2
 3
 4
 5
 6
 7
 8
 9
10
11
12
13
14
15
16
17
18
19
20
NAME: consul
LAST DEPLOYED: Wed Jun 21 22:40:35 2023
NAMESPACE: consul
STATUS: deployed
REVISION: 1
NOTES:
Thank you for installing HashiCorp Consul!

Your release is named consul.

To learn more about the release, run:

  $ helm status consul --namespace consul
  $ helm get all consul --namespace consul

Consul on Kubernetes Documentation:
https://www.consul.io/docs/platform/k8s

Consul on Kubernetes CLI Reference:
https://www.consul.io/docs/k8s/k8s-cli

NOTE The version installed in this example is Consul 1.15.3 which is the most recent version of Consul as of June 2023.

Now run the following command to see the status of the newly created resources.

1
kubectl get statefulset,deployment -n consul
1
2
3
4
5
6
7
NAME                             READY   AGE
statefulset.apps/consul-server   1/1     10m

NAME                                          READY   UP-TO-DATE   AVAILABLE   AGE
deployment.apps/consul-connect-injector       1/1     1            1           10m
deployment.apps/consul-webhook-cert-manager   1/1     1            1           10m
deployment.apps/prometheus-server             1/1     1            1           10m

The deployment consul-connect-injector is responsible for injecting services mesh sidecars as well as keeping the Kubernetes probes in sync with Consul. The consul-webhook-cert-manager deployment is responsible for creating certificates. The prometheus-server deployment runs Prometheus, see Prometheus for more details, and the stateful set consul-server manages persistence claim volumes for the Consul server, remember this should be highly available, losing the claim volume could result in total loss of data.

Note that these resources could take up to a minute to be created, though normally you should expect them to be created within a couple of seconds.

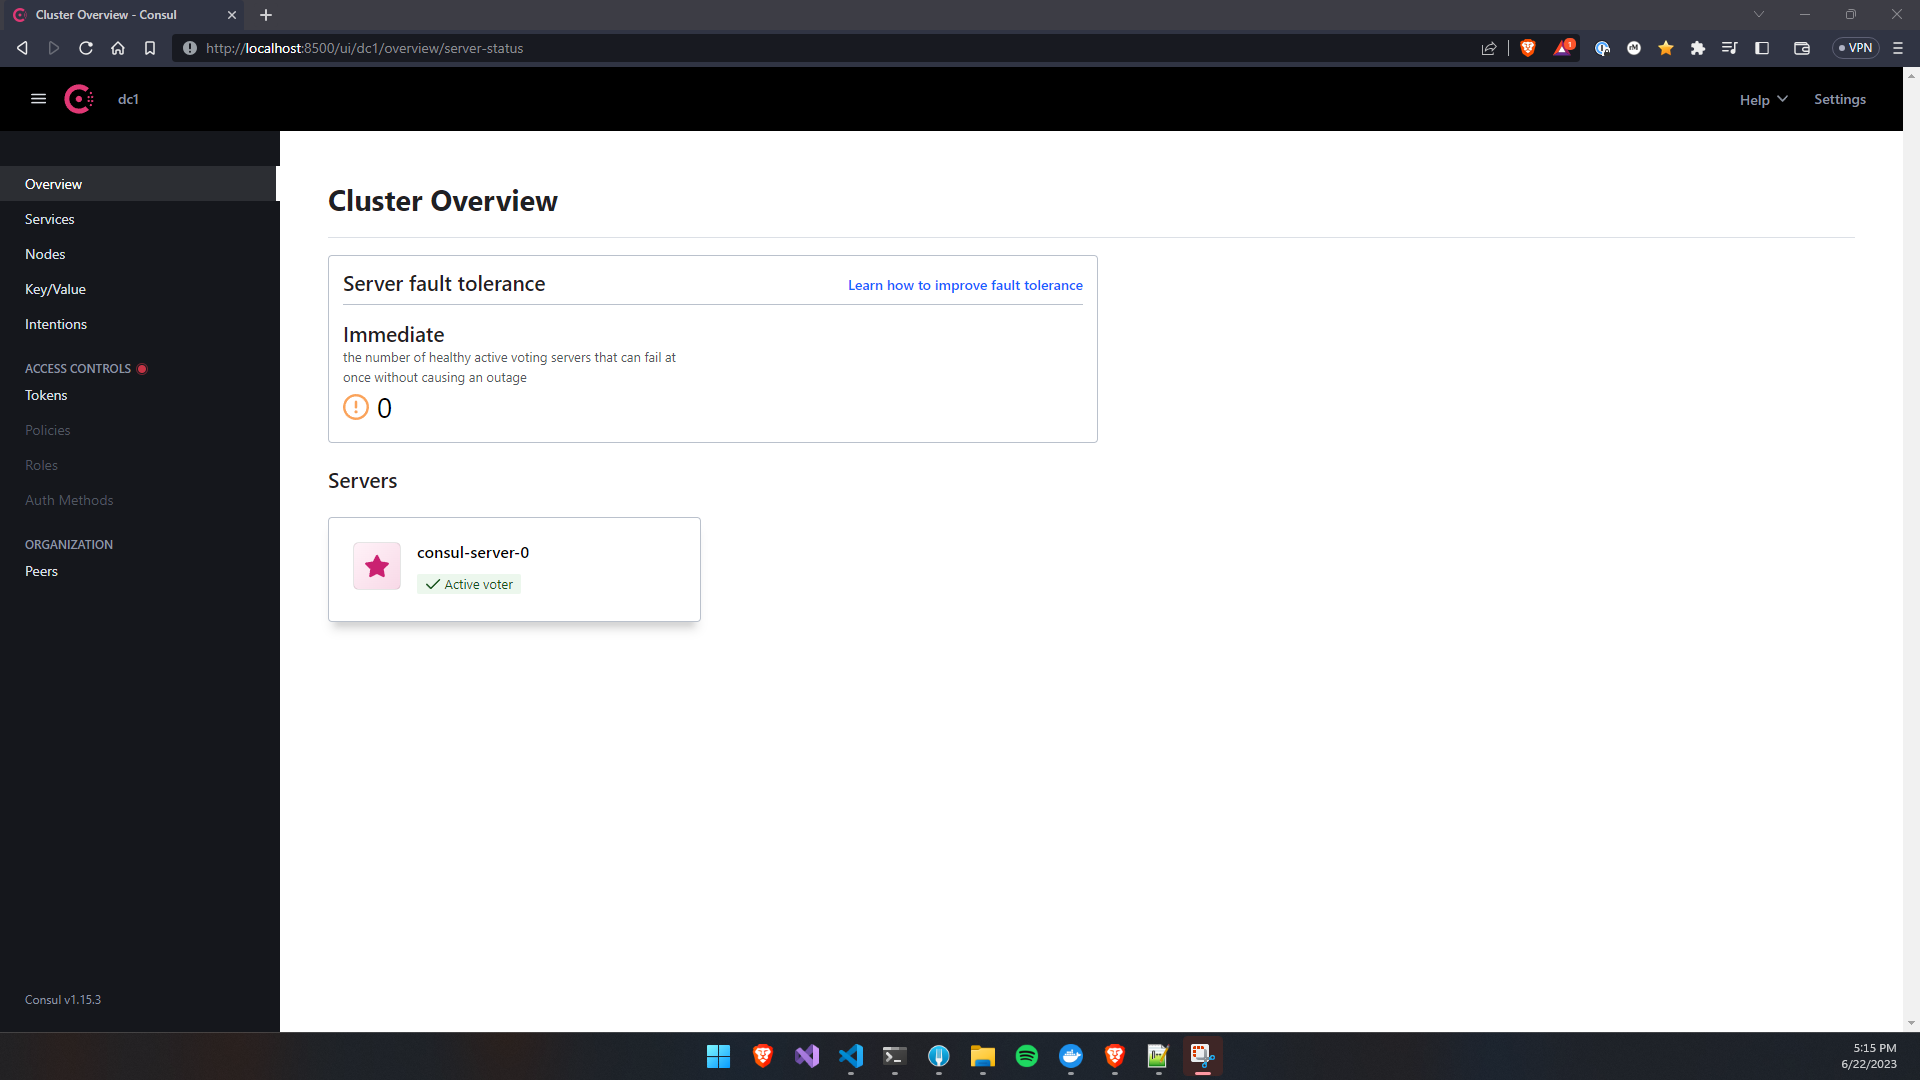
An additional confirmation to Consul being successfully installed is to connect to the UI using a port-forwarding proxy, you can do so by executing the following command.

1
kubectl port-forward service/consul-server --namespace consul 8500:8500

Then on a web browser navigate to http://localhost:8500/ui/, you should see the Consul UI as shown in the screenshot below.

Consul Running On Kubernetes

Next, let me confirm that the Blazor app is still up and running.

Blazor App Still Running

And it is, great, while Consul has been installed successfully it is still not handling the network communication between the two pods. In order for Consul to handle the network communication between pods, the pods need to be added to the service mesh via pod annotation, see Annotations for more details. In Consul, the annotation required is consul.hashicorp.com/connect-inject:“true”.

Adding Services to the Mesh

The annotation, consul.hashicorp.com/connect-inject:“true”, needs to be added to each pod running under the frontend app deployment, to add the annotation I will need to modify the values.yaml file from

1
podAnnotations: {}

to the following.

1
2
podAnnotations:
  "consul.hashicorp.com/connect-inject": "true"

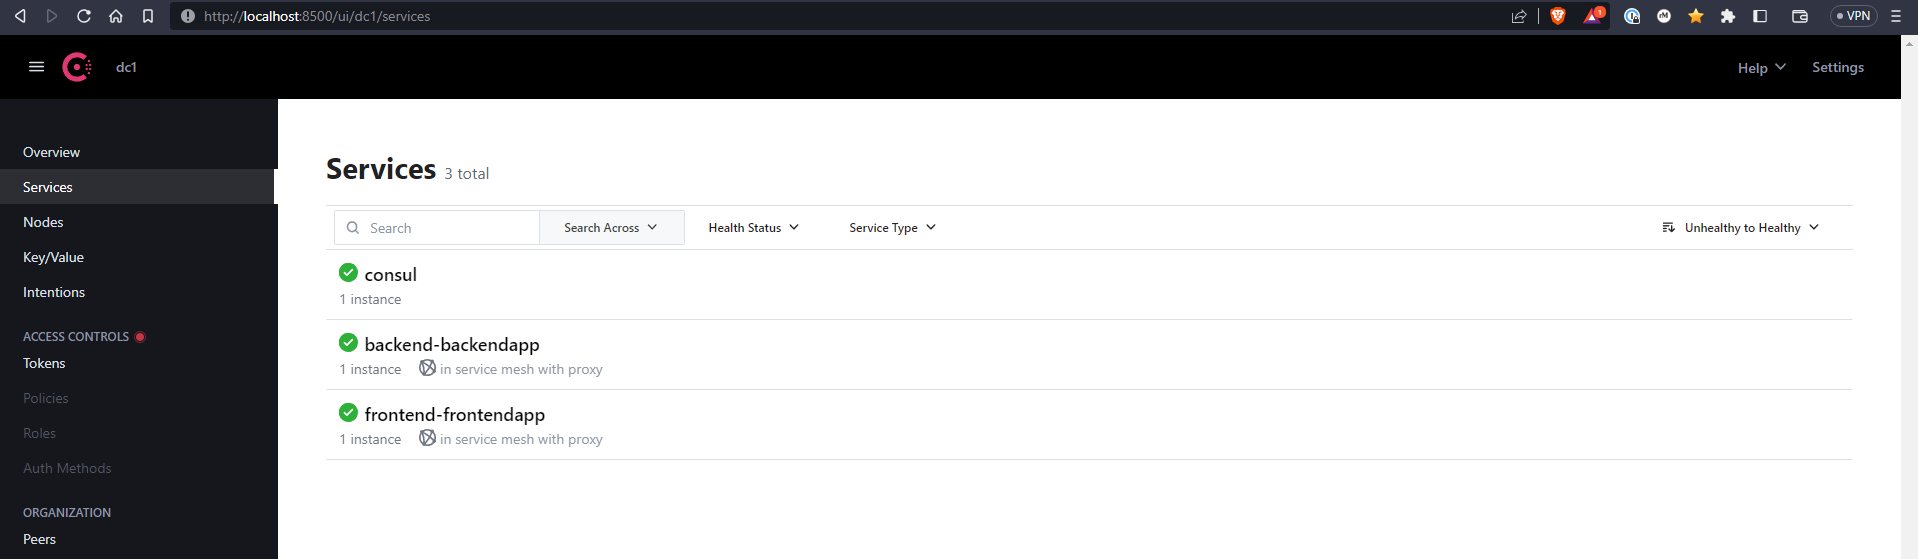
With the annotation now added to the deployment.yaml file, the app can be redeployed. After redeploying the app, and returning to the Consul UI, the frontend app should now be registered under Services as shown in the screenshot below.

Frontend App Register In Consul

Consul uses a mutating webhook, that is, an HTTP callback that allows third-party applications to modify Kubernetes Resources. When the frontend pod was scheduled, Kubernetes called Consul’s mutating webhook, which allows Consul to look at the pod definition to see if it has the consul.hashicorp.com/connect-inject:“true” annotation, if it does, Consul modifies the pod to add a sidecar proxy.

Time to add the “backendapp” to the mesh, as before, I will update the values.yaml file to include the required annotation on any backend pod.

1
2
podAnnotations: 
  consul.hashicorp.com/connect-inject: "true"

Redeploying the backend app and visiting the Consul UI shows the app was successfully registered, see the screenshot below.

Both apps in Consul

This means both apps are now secure by the Consul Service Mesh since Consul is secure by default, this also means that no traffic outside of the mesh may reach the apps, not very useful, but I’ll change that in part 2 of this blog series.

First, let’s prove that the apps are secure by Consul and that only authenticated and authorized traffic is allowed to reach the applications. In my current cluster, aside from the frontend and backend app I have a few other pods, one of them being the consul server itself, if I have configure everything correctly, then the consul server pod should not be able to communicate with the frontend app, this can be proven by executing the following command.

1
kubectl exec consul-server-0 -n consul -- curl -sS http://frontend-frontendapp:80

I get this as a response.

1
2
curl: (52) Empty reply from server
command terminated with exit code 52

This means the frontend app is secure, containers that are not in the Service Mesh cannot talk to applications that are within the mesh, essentially the Service Mesh rejectes any unauthorized traffic, I can further prove that by removing the Consul annotation from the frontendapp, then redeploying the frontend app, and executing the same command, though this time I get a different response.

 1
 2
 3
 4
 5
 6
 7
 8
 9
10
11
12
13
14
15
16
17
18
19
20
21
22
23
24
25
26
27
28
29
30
31
32
33
34
35
36
37
38
39
40
41
42
43
44
45
46
47
48
49
50
51
52
53
54
55
<!DOCTYPE html>
<html lang="en">
<head>
    <meta charset="utf-8" />
    <meta name="viewport" content="width=device-width, initial-scale=1.0" />
    <base href="/" />
    <link rel="stylesheet" href="css/bootstrap/bootstrap.min.css" />
    <link href="css/site.css" rel="stylesheet" />
    <link href="FrontEndApp.styles.css" rel="stylesheet" />
    <link rel="icon" type="image/png" href="favicon.png"/>
    <!--Blazor:{"sequence":0,"type":"server","prerenderId":"ee0f04c3fa464763b57c57330cede53f","descriptor":"CfDJ8JJV\u002BT0V21FCl\u002Bk1k\u002BLUY\u002BBnKRRxy3paaV9R7emQy2NWR\u002BXDx\u002BwW0sLcOLDKemVI1mSpmb4/qiN4kzx9P0xqw94CAz/bk/llLJNEV7BeQm5ywTpAXn09jXJKz7LDw1rs9MUSeZ6ncDwOZdFFkmuEu/NwIei0XOdnwzxSvEjtvrs0rSIUeZWIWLsRFuMwZX/tcppkDSBJCQNSV9dL0aXaNWQVVKURgi\u002BBXUpy/hL7b8lozx3WJ\u002BktZX2AqNE6DSbtzsXp2i8JpOBLhT3GS2Pu\u002BGWXX\u002B5tPVgQsFvxVYDlRG\u002Bnkbc3FrSaluGIhgmZMoG9901C747UrYYTwj0Fy4qaQ4i/\u002BtGMvwZPWkM9O5A8TWSBQ6\u002Bvrgc7FKXLkF0MwcKJuCVlH0ZCK6oqbUfVJoRk1MNJQTLL9sKcHQc//eQJb\u002BY\u002B"}--><title>Index</title><!--Blazor:{"prerenderId":"ee0f04c3fa464763b57c57330cede53f"}-->
</head>
<body>
    <!--Blazor:{"sequence":1,"type":"server","prerenderId":"a9e663ffbd414a9c82f7811056718548","descriptor":"CfDJ8JJV\u002BT0V21FCl\u002Bk1k\u002BLUY\u002BAIAzoXlkJews\u002BivCBmR0zSEmSPge5jSzQzOvKwgPLyF1HVzKYJkbCOsjNqKHjf6njkosboRc/F6zkql4GFmkDxrvC8B2\u002BsyGz7DUoxO2IAPeY1SQJB7YMMzKuQf/ZoIQrk6BKE3EyjcKPq\u002BWFuSaoP6clUsAErNrZF1o35qh/yo5Aokhsstpf6ypffABkYczzpMXoyH963a\u002BwAWwM4QMYXtwux8bQAONLSoYXnP7juOqzWzjo9nUnM2Zo46TyxoPPa9627V2BS4eRWG07EcljuIMjuS6rGmDZ3u\u002BNfprAO8DppGJ1EgDZg3XXiguNVCQdAQC0TeG9B4GEslITYFIJB"}-->

<div class="page" b-u0fy2w1pvo><div class="sidebar" b-u0fy2w1pvo><div class="top-row ps-3 navbar navbar-dark" b-125dvlpeqw><div class="container-fluid" b-125dvlpeqw><a class="navbar-brand" href b-125dvlpeqw>FrontEndApp</a>
        <button title="Navigation menu" class="navbar-toggler" b-125dvlpeqw><span class="navbar-toggler-icon" b-125dvlpeqw></span></button></div></div>

<div class="collapse nav-scrollable" b-125dvlpeqw><nav class="flex-column" b-125dvlpeqw><div class="nav-item px-3" b-125dvlpeqw><a href="" class="nav-link active"><span class="oi oi-home" aria-hidden="true" b-125dvlpeqw></span> Home
            </a></div>
        <div class="nav-item px-3" b-125dvlpeqw><a href="counter" class="nav-link"><span class="oi oi-plus" aria-hidden="true" b-125dvlpeqw></span> Counter
            </a></div>
        <div class="nav-item px-3" b-125dvlpeqw><a href="fetchdata" class="nav-link"><span class="oi oi-list-rich" aria-hidden="true" b-125dvlpeqw></span> Fetch data
            </a></div></nav></div></div>

    <main b-u0fy2w1pvo><div class="top-row px-4" b-u0fy2w1pvo><a href="https://docs.microsoft.com/aspnet/" target="_blank" b-u0fy2w1pvo>About</a></div>

        <article class="content px-4" b-u0fy2w1pvo>

<h1>Hello, world!</h1>

Welcome to your new app.

<div class="alert alert-secondary mt-4"><span class="oi oi-pencil me-2" aria-hidden="true"></span>
    <strong>How is Blazor working for you?</strong>

    <span class="text-nowrap">
        Please take our
        <a target="_blank" class="font-weight-bold link-dark" href="https://go.microsoft.com/fwlink/?linkid=2186158">brief survey</a></span>
    and tell us what you think.
</div></article></main></div>
        <!--Blazor:{"prerenderId":"a9e663ffbd414a9c82f7811056718548"}-->

    <div id="blazor-error-ui">

            An error has occurred. This application may no longer respond until reloaded.


        <a href="" class="reload">Reload</a>
        <a class="dismiss">🗙</a>
    </div>

    <script src="_framework/blazor.server.js"></script>
</body>
</html>

The response is the HTML of the main landing page of the Blazor application, which means that the consul-server pod is now allowed to communicate with the frontend app, due to the removal of the frontend app from the Service Mesh. This is great, but we need to allow traffic from outside the mesh to reach the apps that live within the Service Mesh, we also need to control how apps communicate with each other inside the service. Allowing external traffic into the Service Mesh in a secure fashion will be the responsibility of the Ingress gateways, which I’ll cover in part 2 of this series along with how to establish strong ACLS within the Service Mesh.

Conclusion

Using Consul as a Service Mesh in Kubernetes turned out to be easier than expected, the documentation provided by HashiCorp was super useful and pointed me in the right direction whenever I felt lost. I did encounter a weird behavior with the Web API, the liveness probe was pointing to /swagger, just like the readiness probe, and while the readiness probe was succeeding, the liveness probe was failing, so I had to take off the liveness probe from the Helm chart, I’m not sure what the issue was, once I discover the problem I will share it here.

Part two of this series will be on the Consul Ingress Gateway, after that, I plan to move to Istio and Linkerd, two other popular Service Mesh tools in Kubernetes.

Till then, cheerio.

Resources

Helm Chart Reference

Helm Uninstall Commands

Deploy Consul datacenter